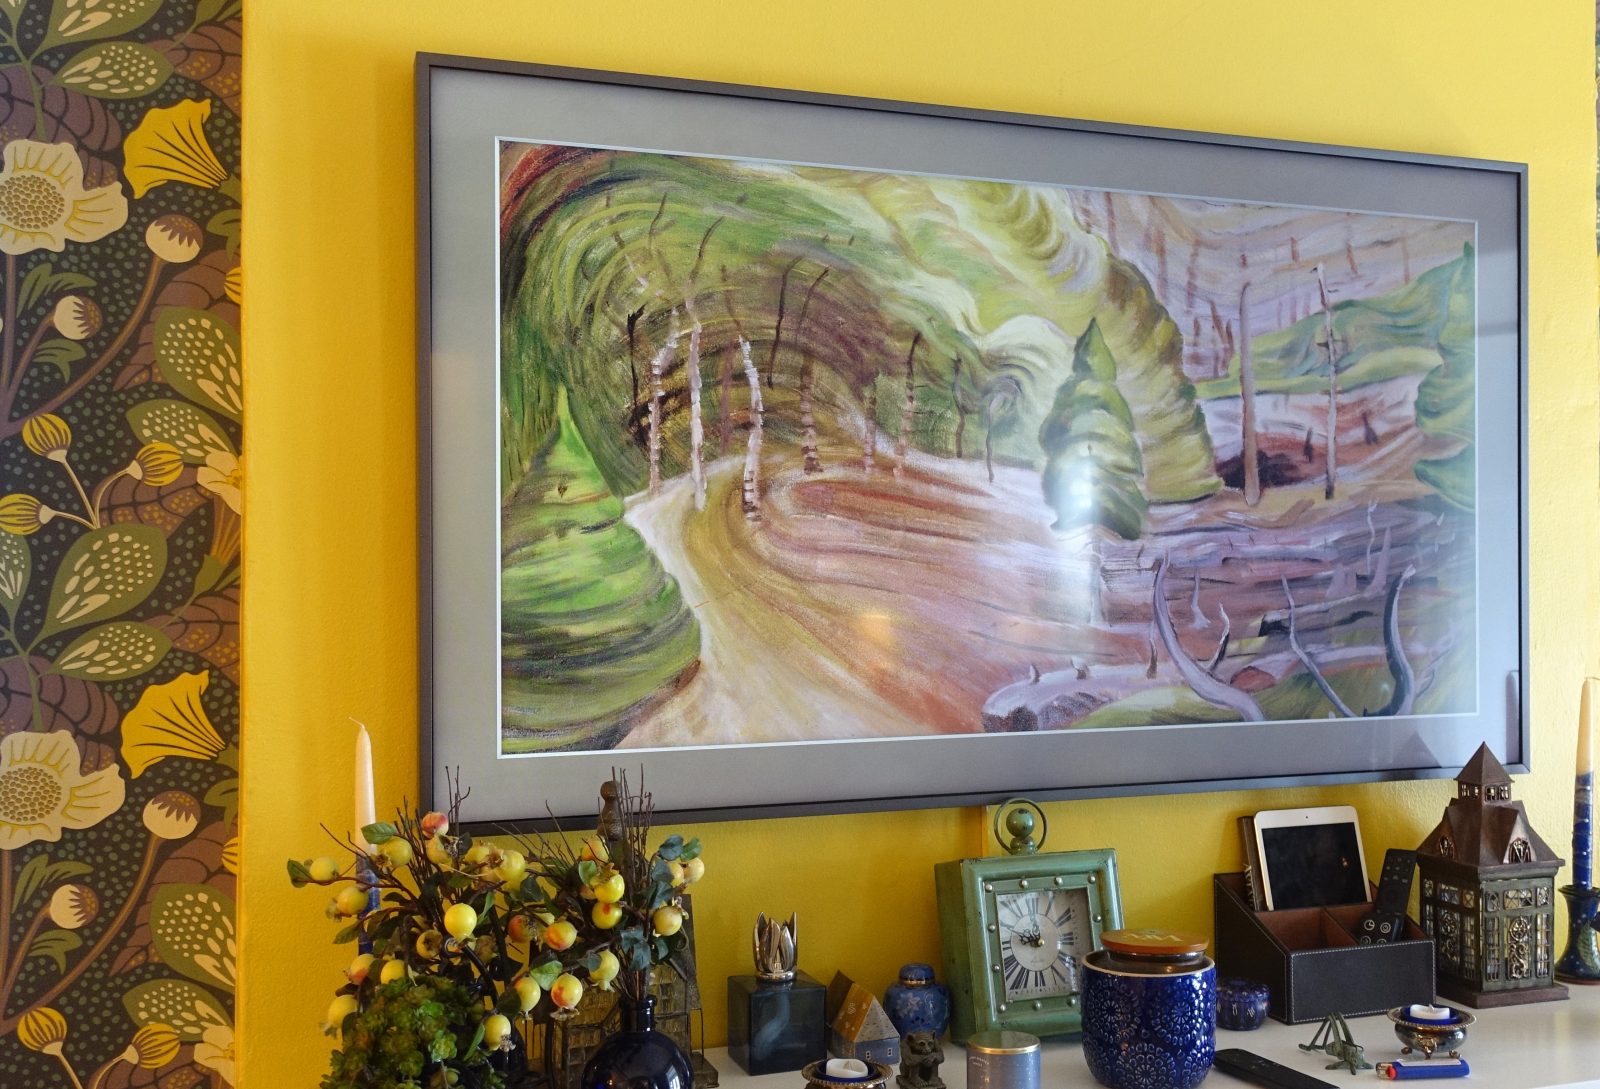
Of all the high-tech devices that populate the Toronto home I share with my infinitely better half, I don’t think there’s one we enjoy more than the 55” Samsung Frame TV that’s mounted above the electric fireplace in our living room. When we’re not watching TV or movies, the Frame TV displays masterpieces by some of our favourite artists: Pieter Breugel (the Elder), Emily Carr, Lawren Harris, Edward Hopper, Gustav Klimt, Paul Renoir, Vincent van Gogh and many more.
Samsung has an online art store that makes it easy to download works by classic and contemporary artists to your Frame TV. But it’s also possible to download classic art from the Internet or personal photos and load it onto your TV—which is how I’ve got all the art for our Frame TV.
Here’s how to do it…
Let’s start at the end—the characteristics of the image file that you want to load onto your Frame TV. The file should have the same dimensions, in pixels, as your TV screen. Except for 32-inch Frame TVs, which have 1080p resolution, all Frame TVs have 4K screens. So, for a 32-inch Frame TV, you want to end up with file with resolution of 1920 x 1080 pixels; for all others, you want a file with resolution of 3840 x 2160 pixels.
There are seven steps. First, find a promising looking image on the Internet. Two, download it to your computer—you can use a Mac or Windows PC. Three, crop it to 16:9 aspect ratio. Four, resize it to the desired resolution. Five, copy the image to a thumb drive. Six, load the image onto your Frame TV. Seven, choose the colour and style of matte you want for your new virtual artwork.
While you can use any search engine to scour the Internet for art for your Frame TV, I prefer Bing to Google. Bing shows the resolution of each image; and it’s simpler to download images from Bing. I’m going to use Bing for this tutorial. And I’m going to assume that your Frame TV is arrayed conventionally, i.e. horizontally, and that you have a model 43” or larger, i.e. an Ultra High Definition Frame TV. Let’s get started.
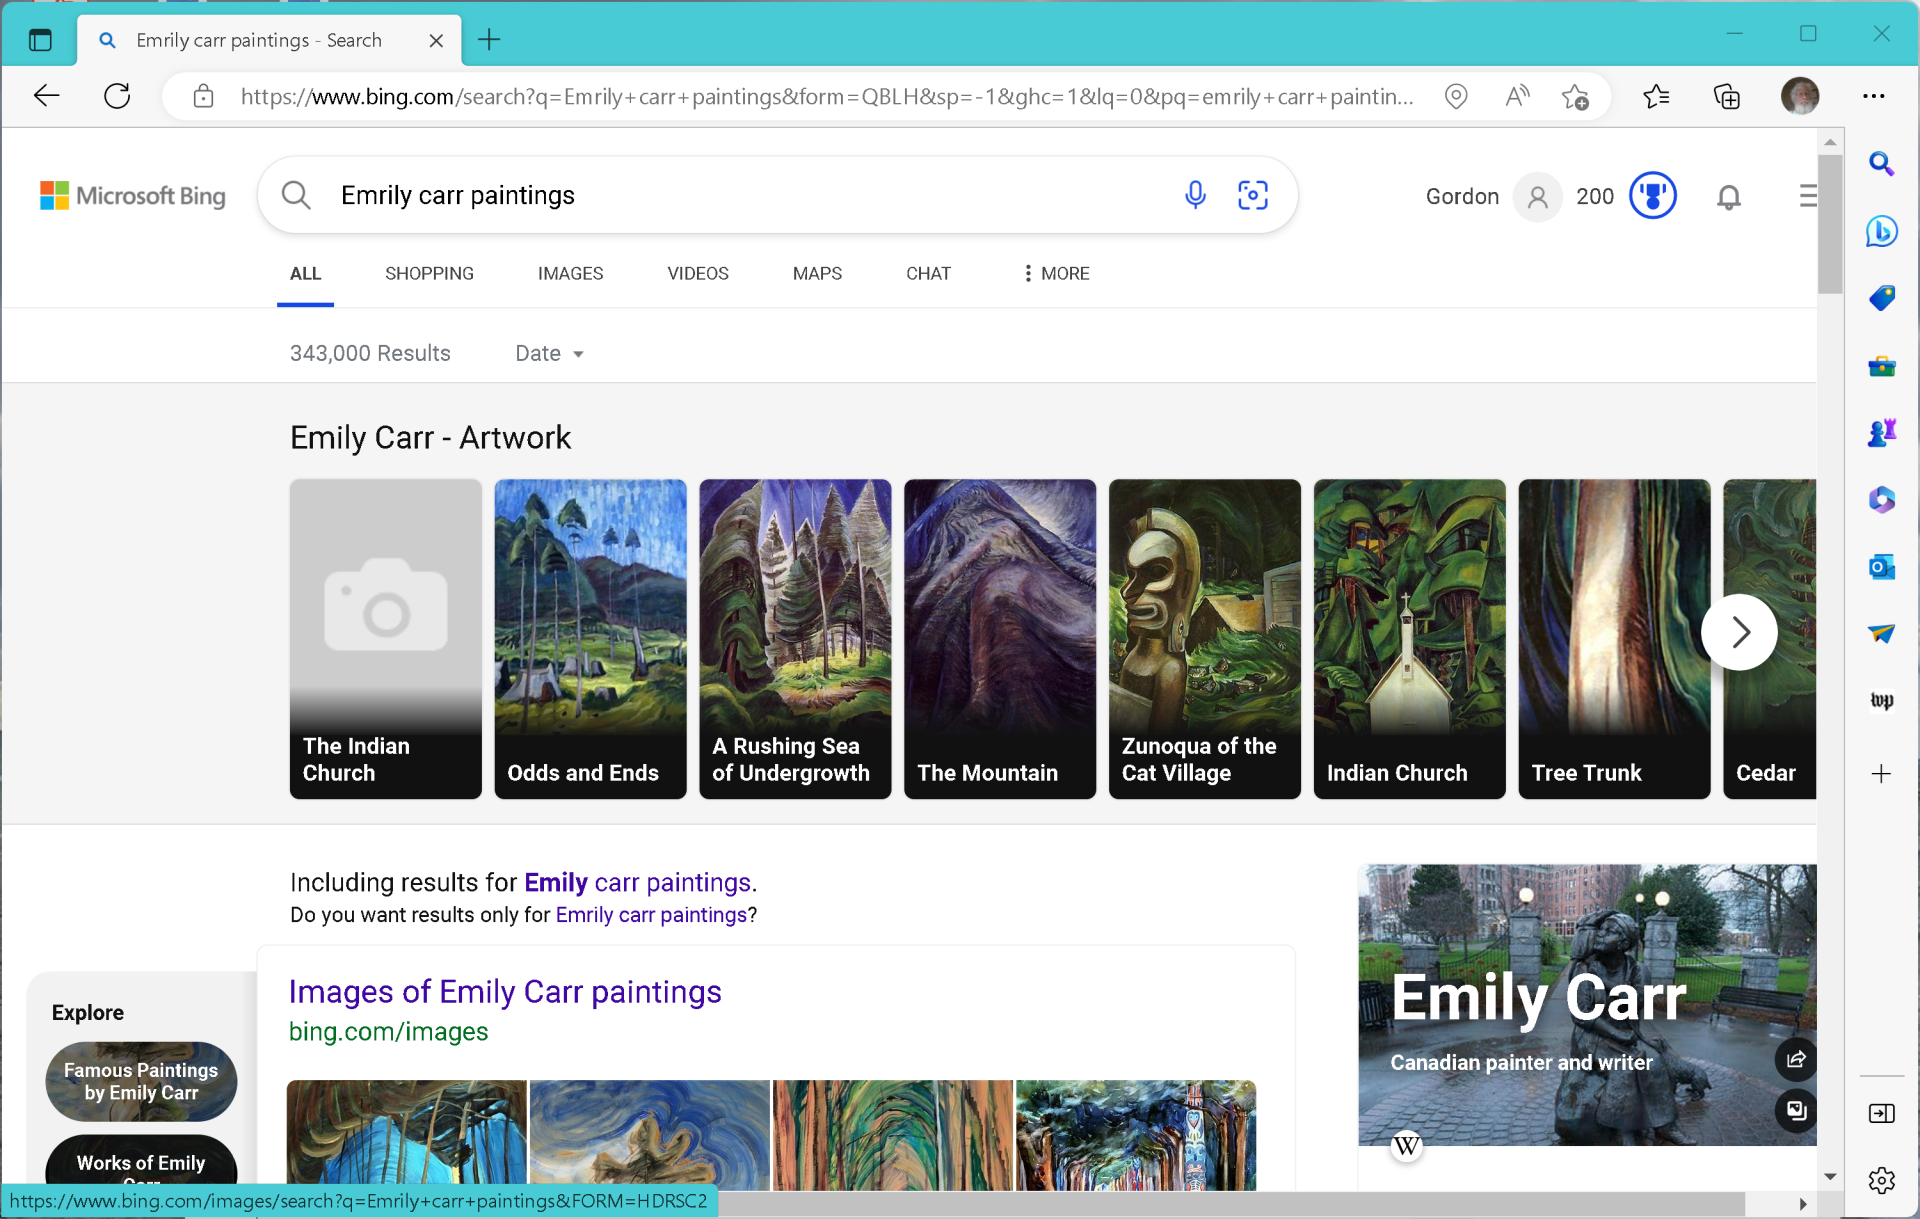
The first two steps work the same for PCs and Macs. Let’s say you want a landscape painting by the Canadian artist Emily Carr. Navigate to Bing.com in your Web browser, and then enter “Emily Carr paintings” as your search term. The search results will offer links to websites, e-tailers, images, videos and maps related to your search. Choose the Images option just near the top of the browser window.
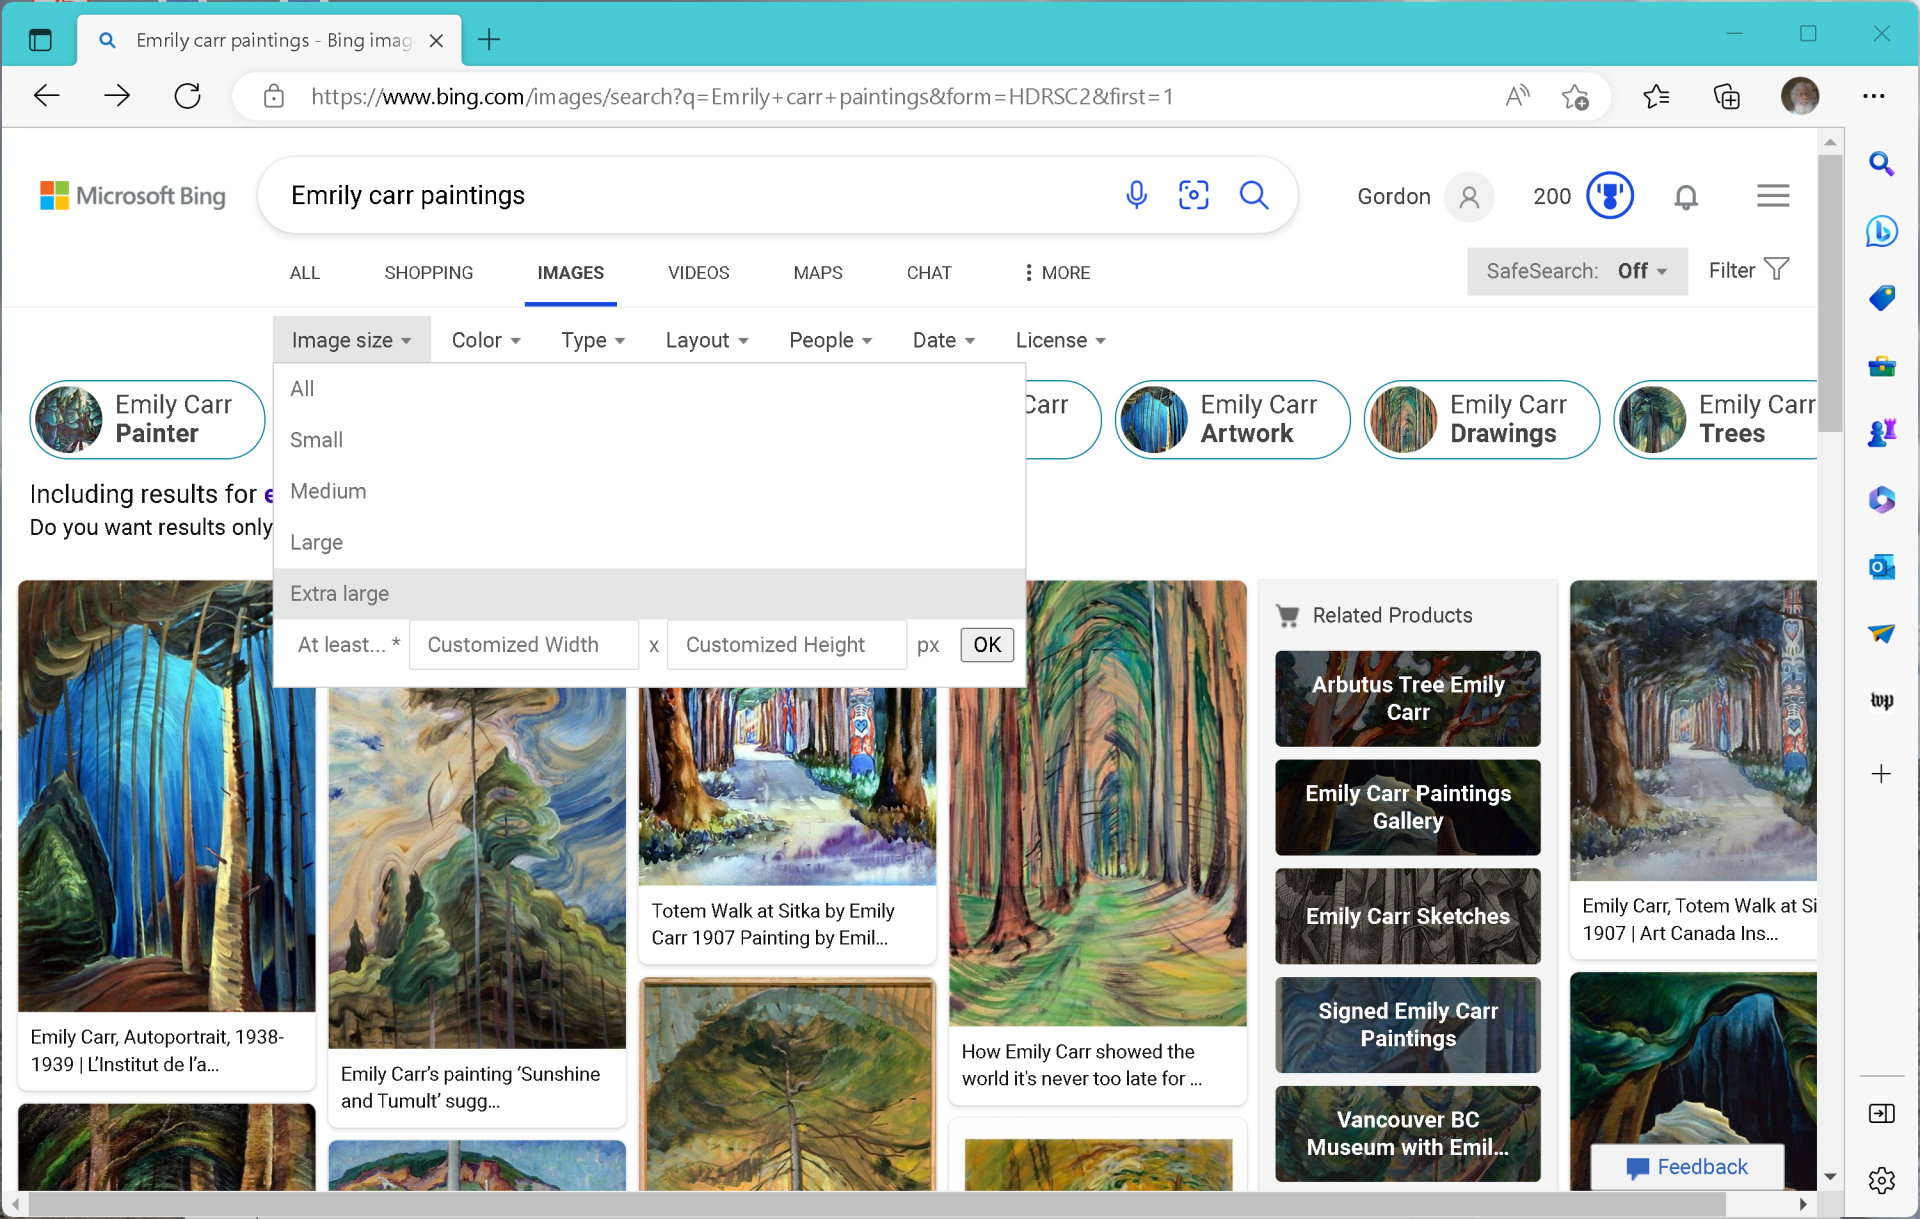
While you want to end up with a file whose resolution is 3840 x 2160 pixels, you don’t have find a file with exactly those dimensions. But you want a horizontal high-resolution image. You can tell Bing to show just high-res images by tapping the Filter icon at the top right of the screen, then choosing the Image size function on the left side, and selecting the Extra Large option from the drop-down list.
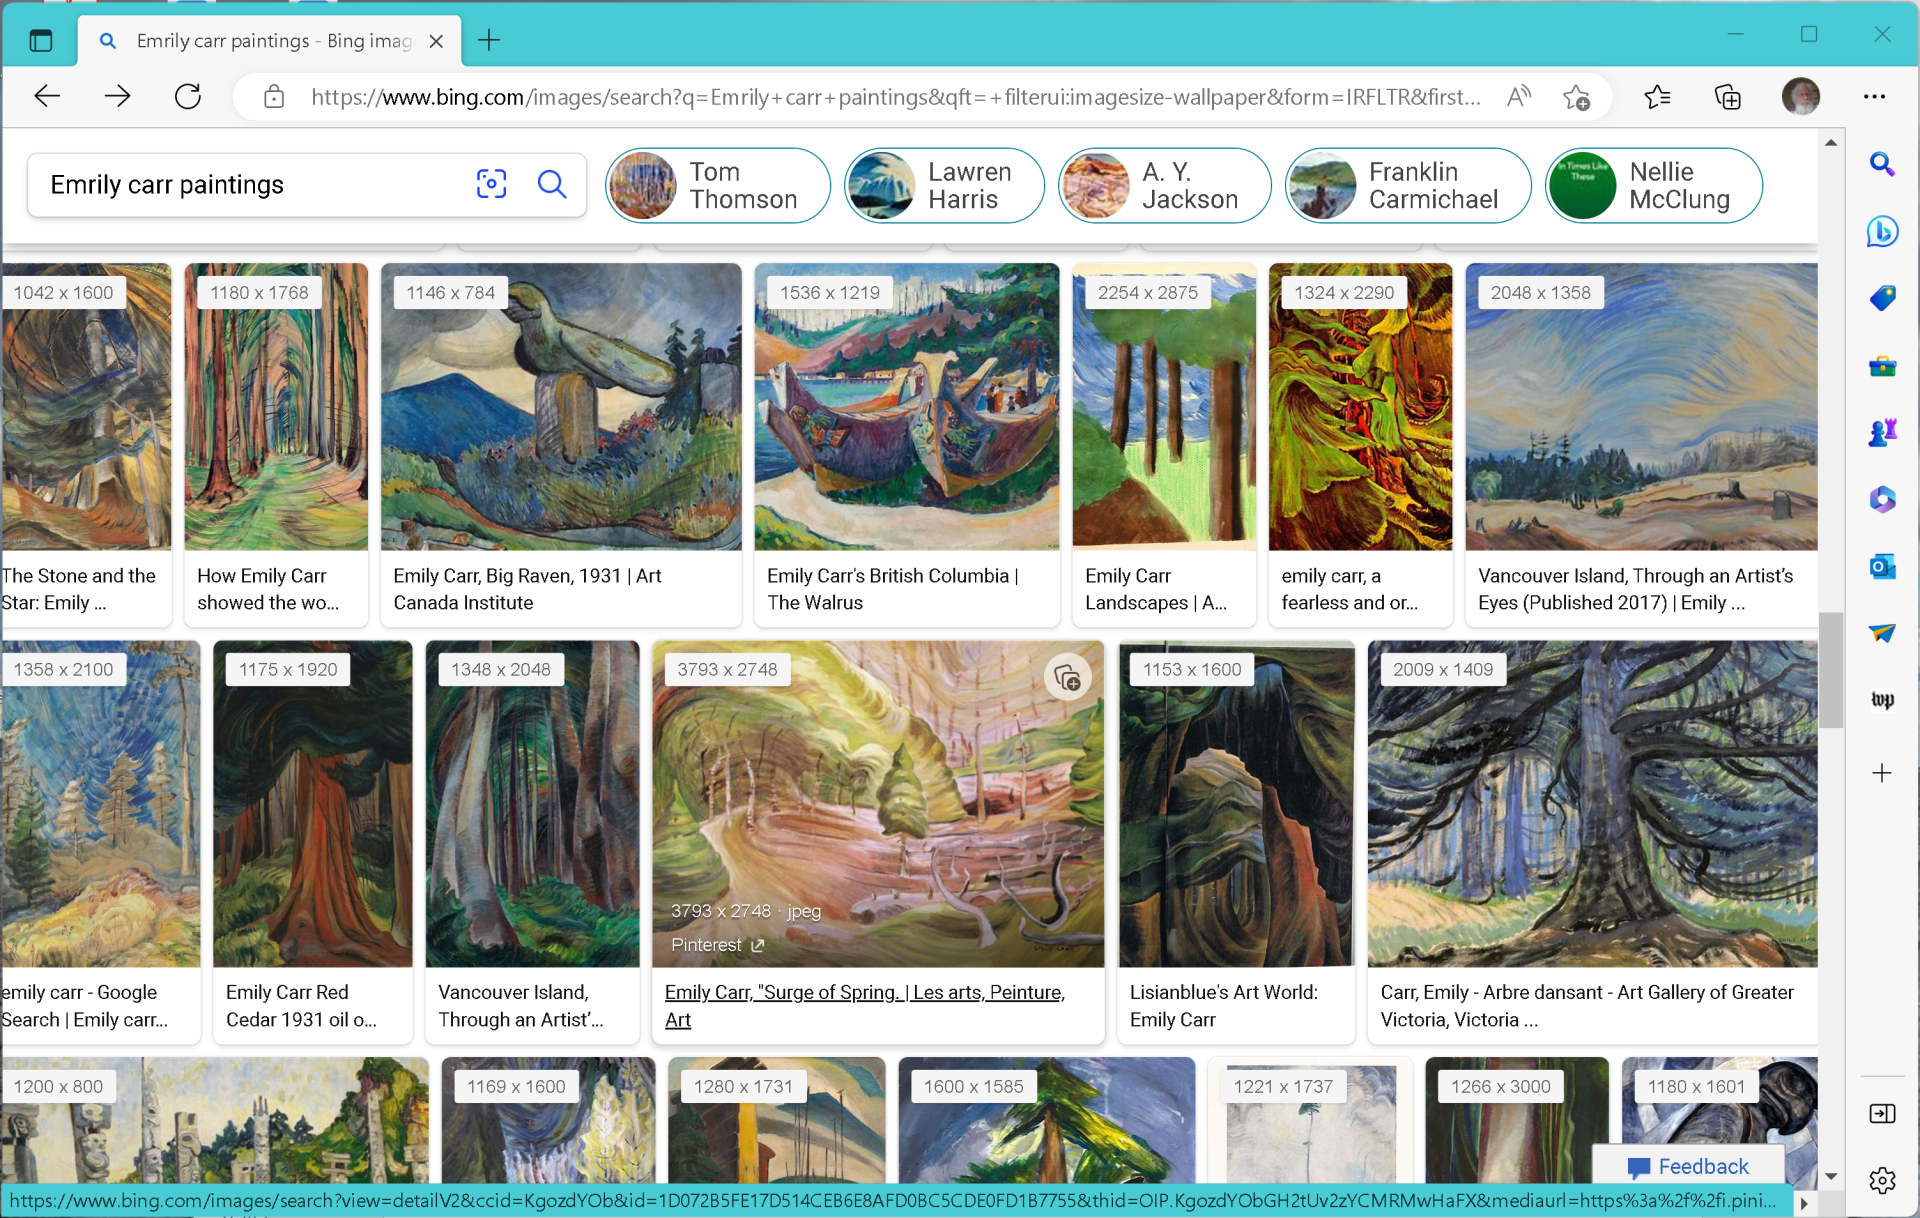
Now browse the results, looking for horizontal images with at least 1000-pixel horizontal resolution that look like they can be cropped to 16:9 (the shape of all HDTV and UHD TV screens) without losing important elements. The fact that Bing shows resolutions of displayed images will simplify your search.
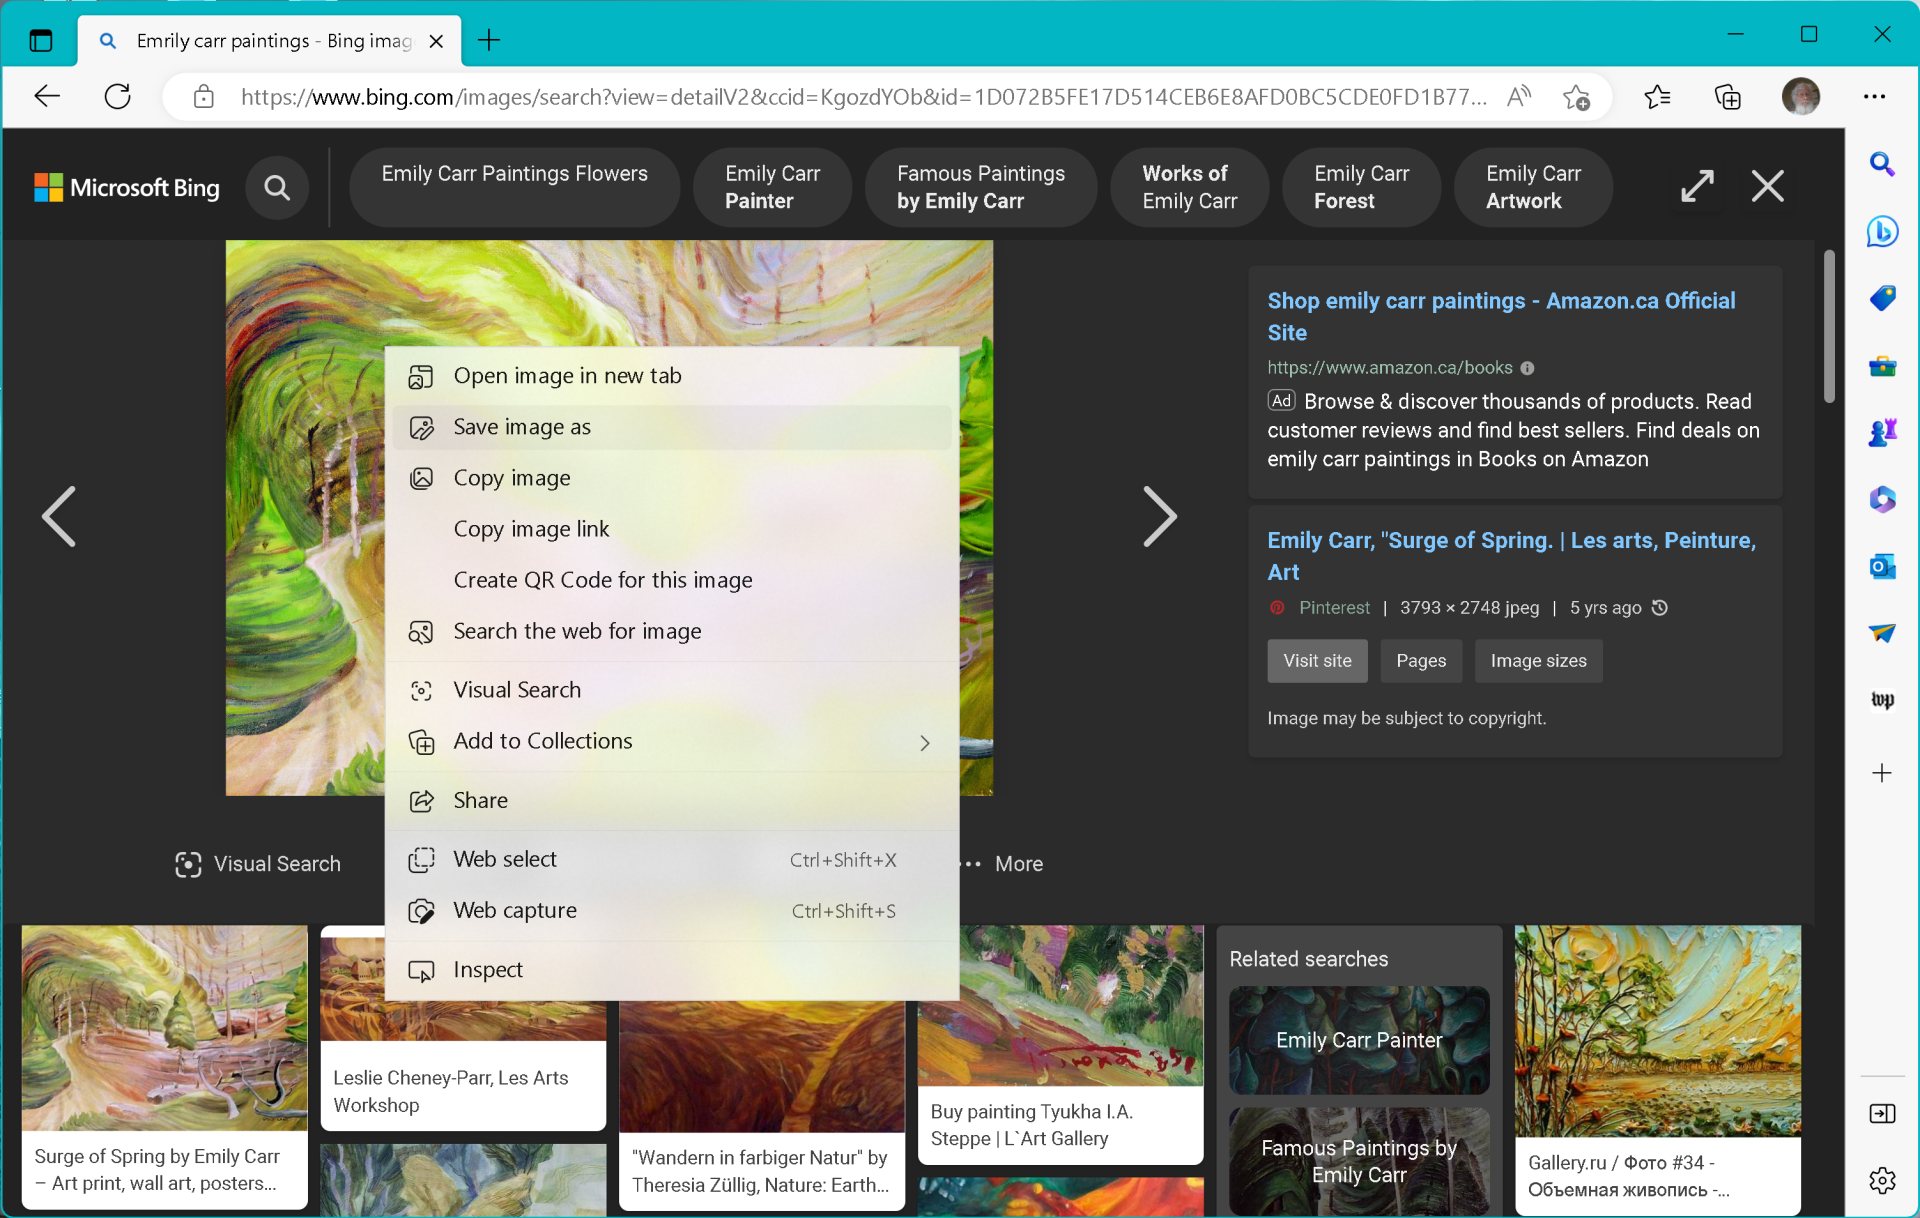
When you find an image you like that meets those criteria, right-click it, and in the next window, left-click on the image, and choose Save image as … from the drop-down menu, then in the dialog box, give the file a descriptive filename and click Save. You can repeat this process for other images if you want to get a bunch of images for your Frame TV at the same time.
The next step is cropping and resizing your downloaded art so that it displays correctly on your Frame TV. You can do this with free software tools that are part of the Windows and macOS operating systems. The process is a little different for the two platforms. Let’s look at Windows first.

Navigate to the folder where you saved your image(s) and then double-click on the image to open the file in Windows’ Photos app. Then click the Edit image icon of the menu bar at the top.
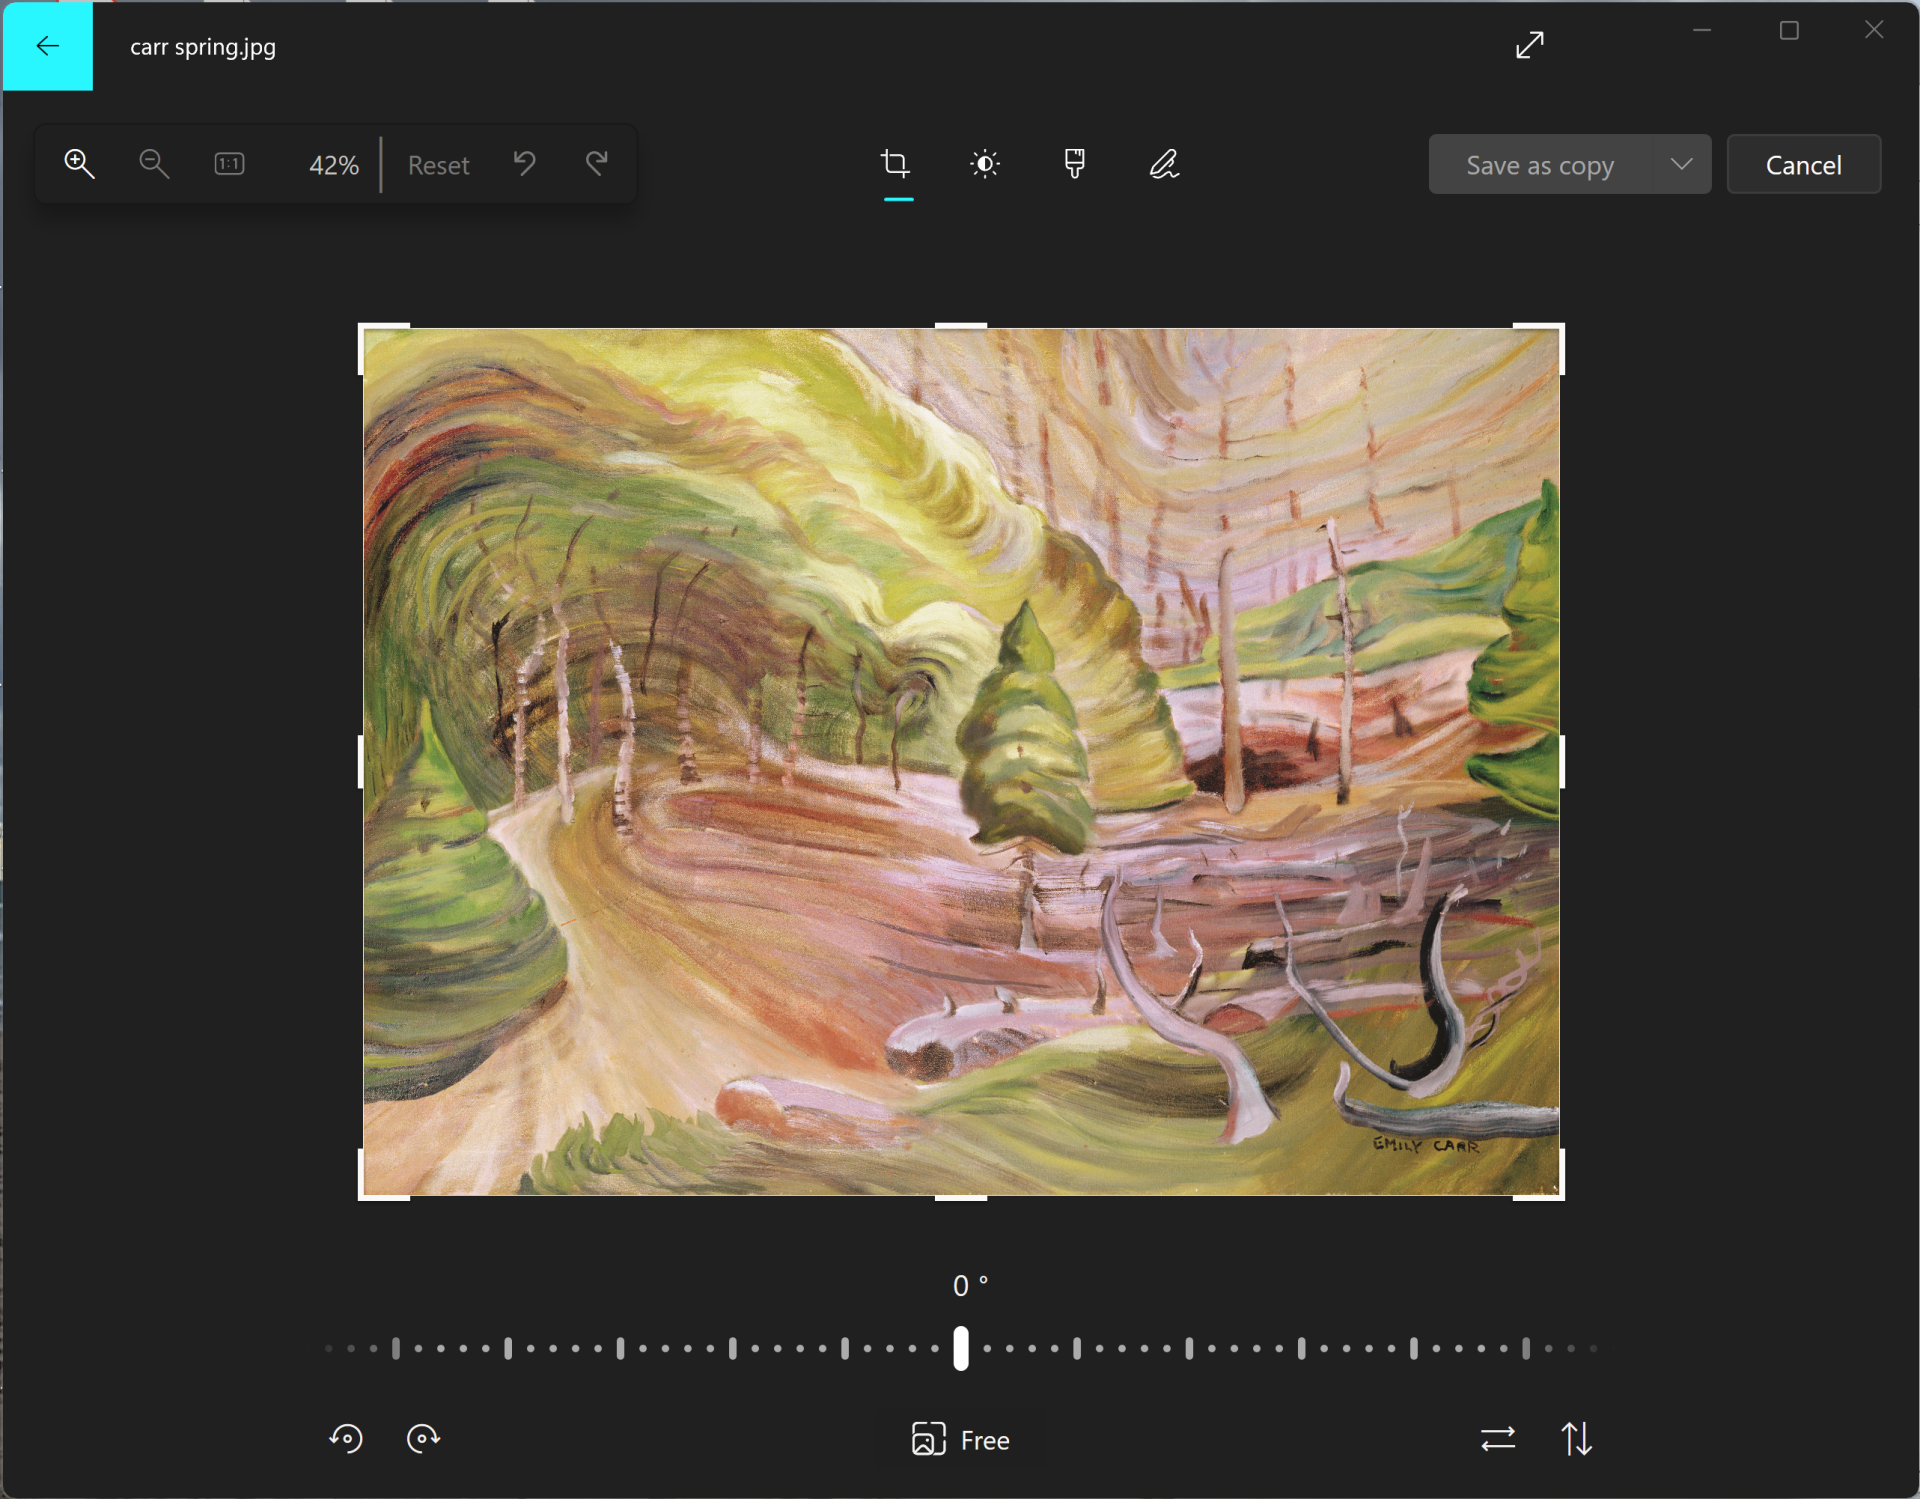
In the next screen, your image will appear in the Photos app’s crop screen, exactly where you want it to be. You can crop the image manually by dragging the bars on the sides, top and bottom, and you can rotate it with the slider control near the bottom. You don’t want to do any of these things, because the Photos app can do most of the work for you.
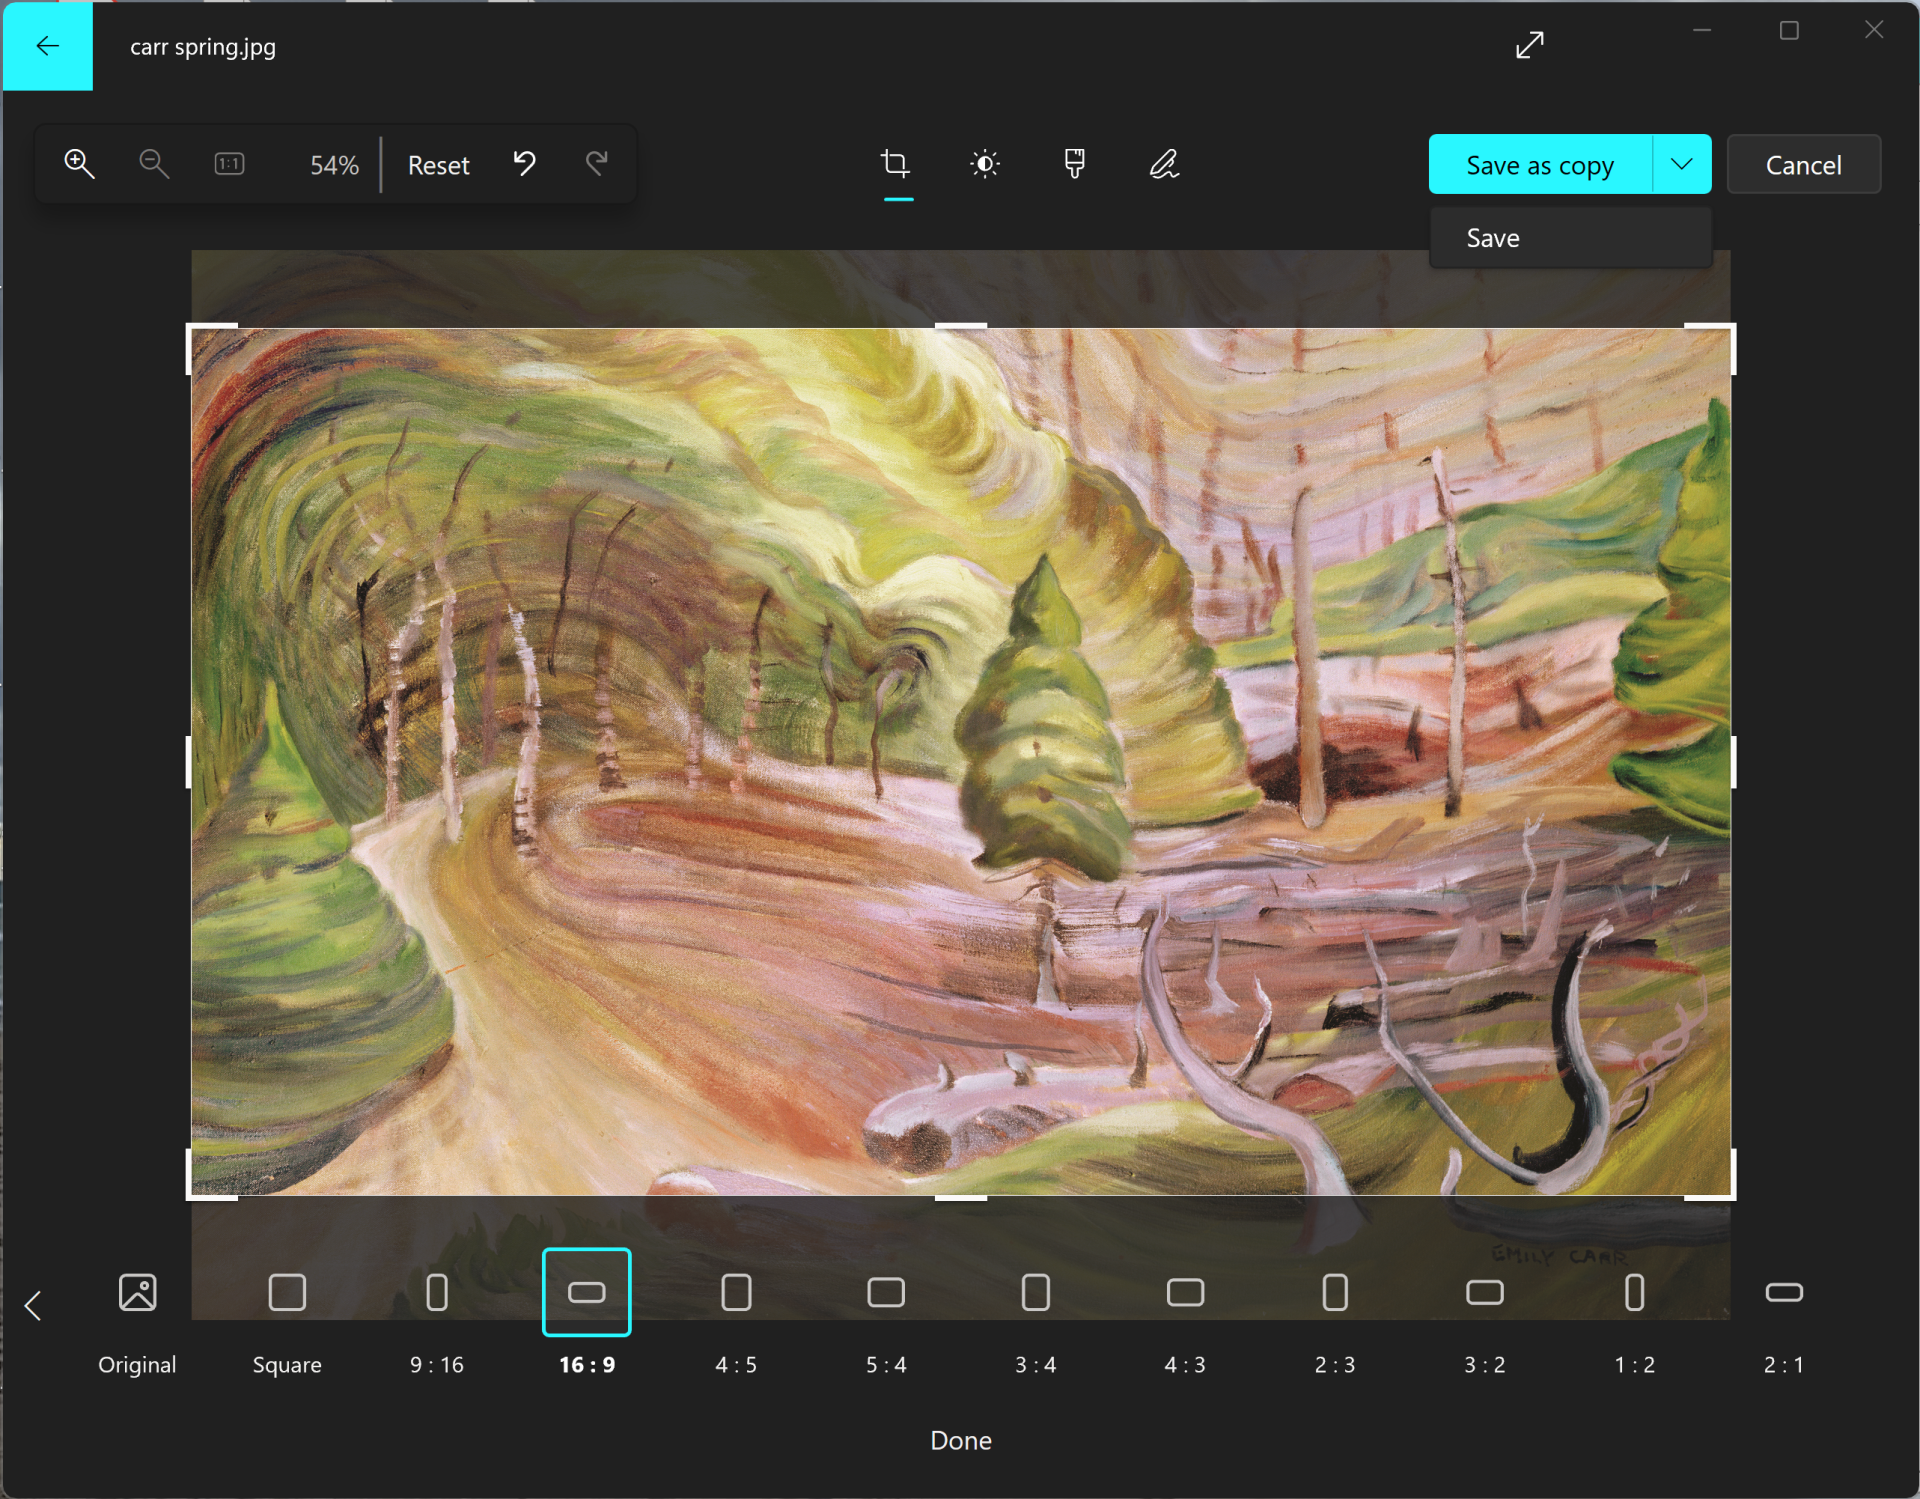
Click the button marked “Free” at the bottom of the screen. You’ll see a horizontal list of different aspect ratios. Choose 16:9, and the app will impose a 16:9 overlay on your image. Unless the image had 16:9 aspect ratio to begin with, you’ll have to crop out elements at the top or bottom (if the downloaded image is too high) or on the sides (if it’s too wide). In some cases, this will be impossible without losing vital detail; in which case you may have to abandon the image and look for something else. But if you’ve been aware of the desired aspect ratio when searching for images, this won’t happen often. Drag the overlaid box so that the most important elements are preserved, then save your work.
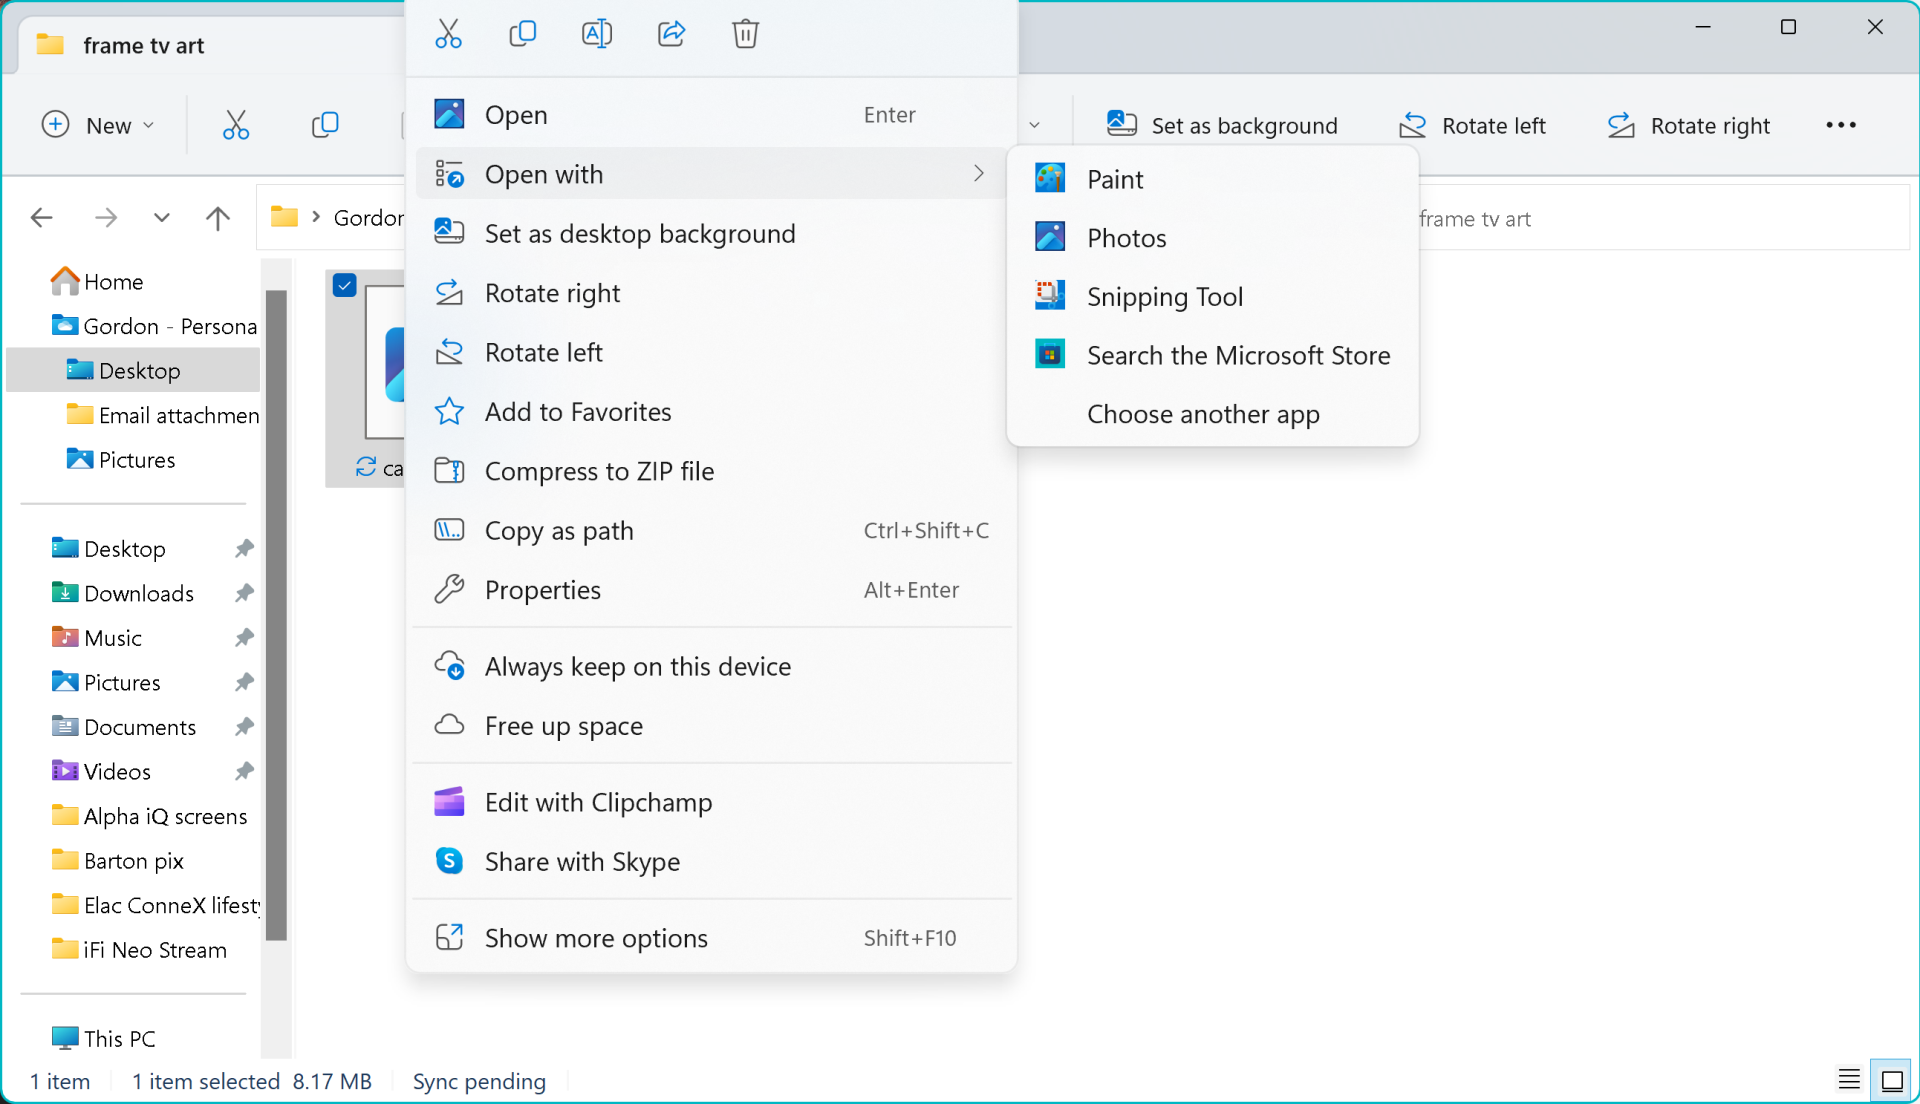
The next step is resizing your image to 3840 x 2160 pixels. Exit the Photos app, and navigate back to the folder containing your image file(s). Right-click on your image file, and choose the Open with … option, and select Paint from the drop-down list.
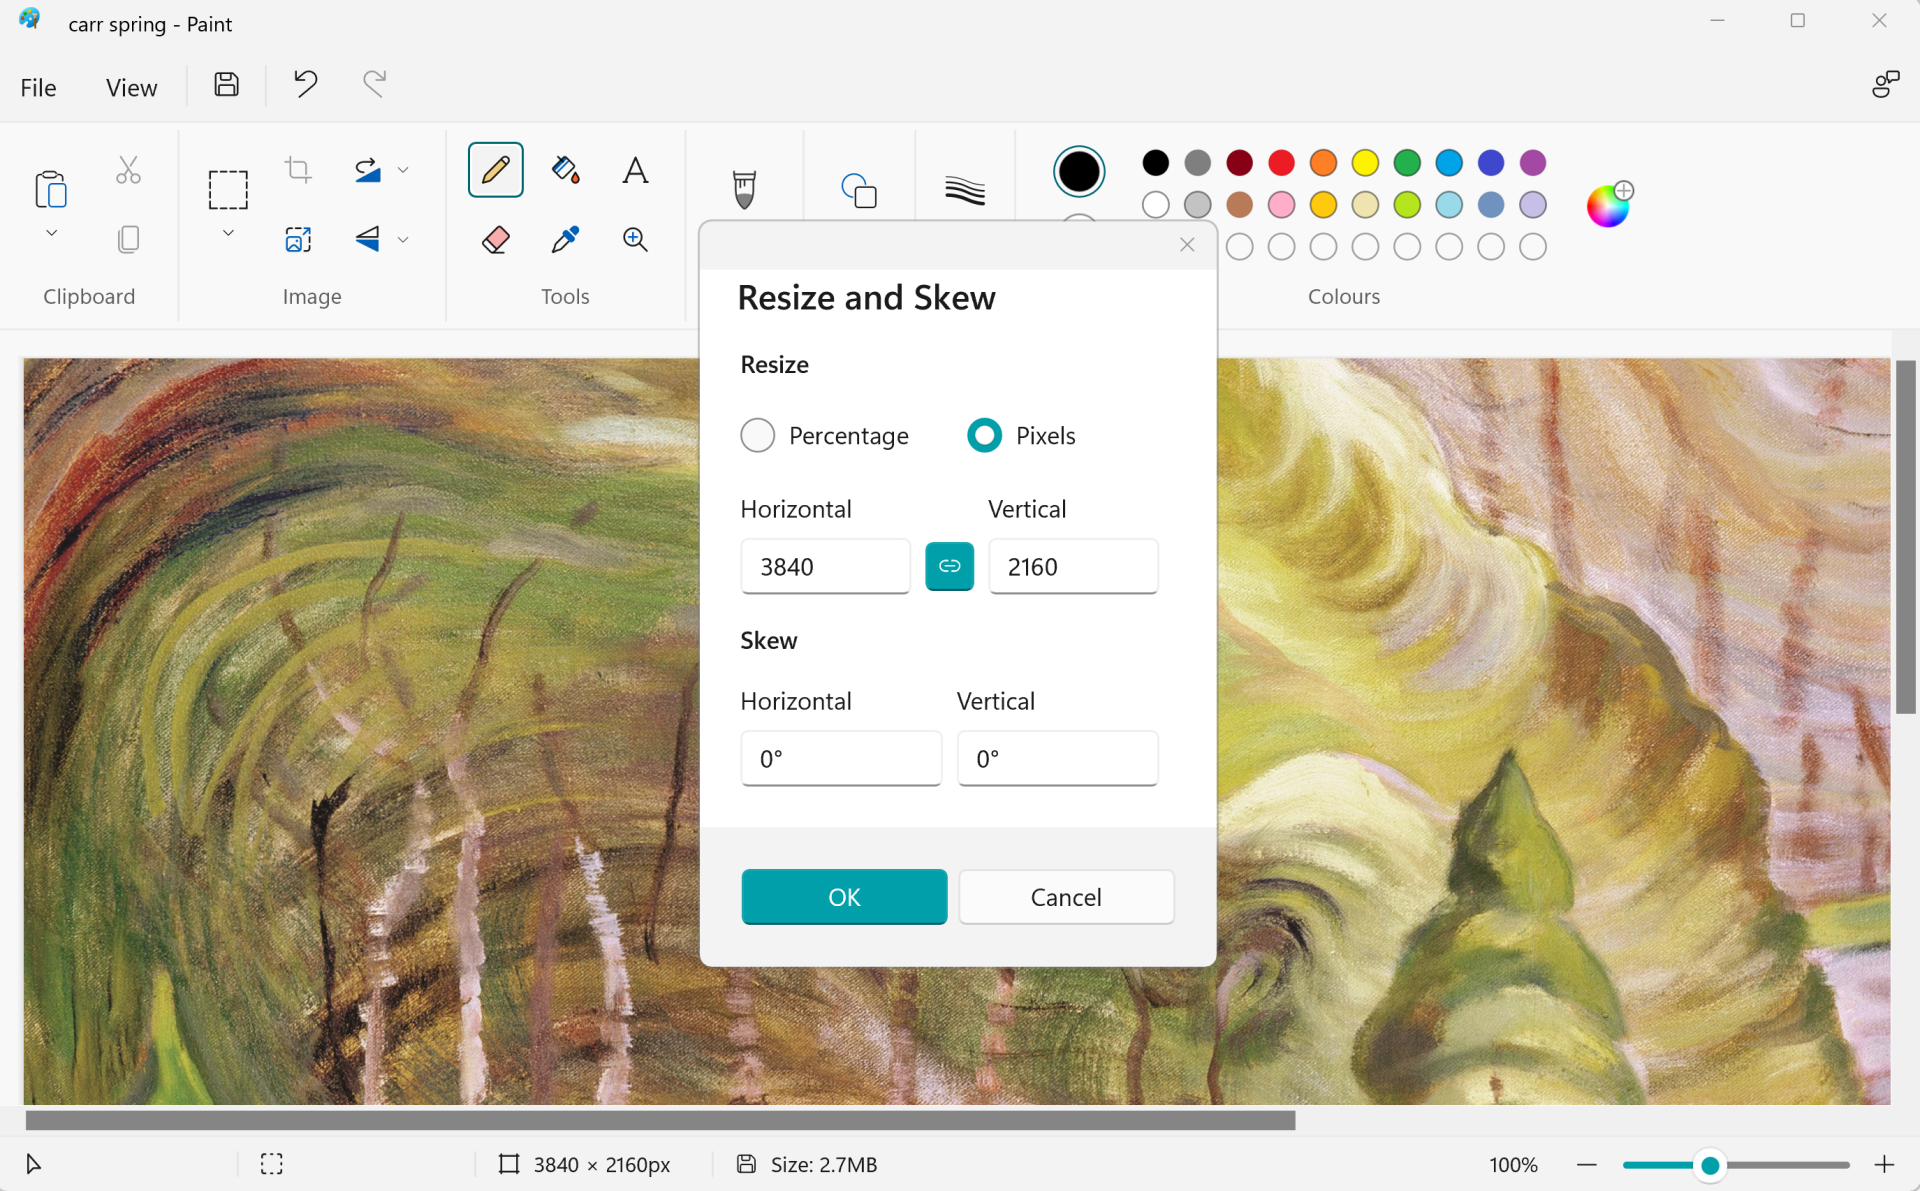
In the Paint app, click the Resize and skew icon in the Image menu near the top left side of the screen, and then in the dialog box that opens, click the Pixels button and enter 3840 into the Horizontal dimensions field. The Vertical field will be automatically set to 2160, because you’ve already cropped your image to 16:9. Save your file and you have an image that’s ready to be loaded onto your Frame TV.
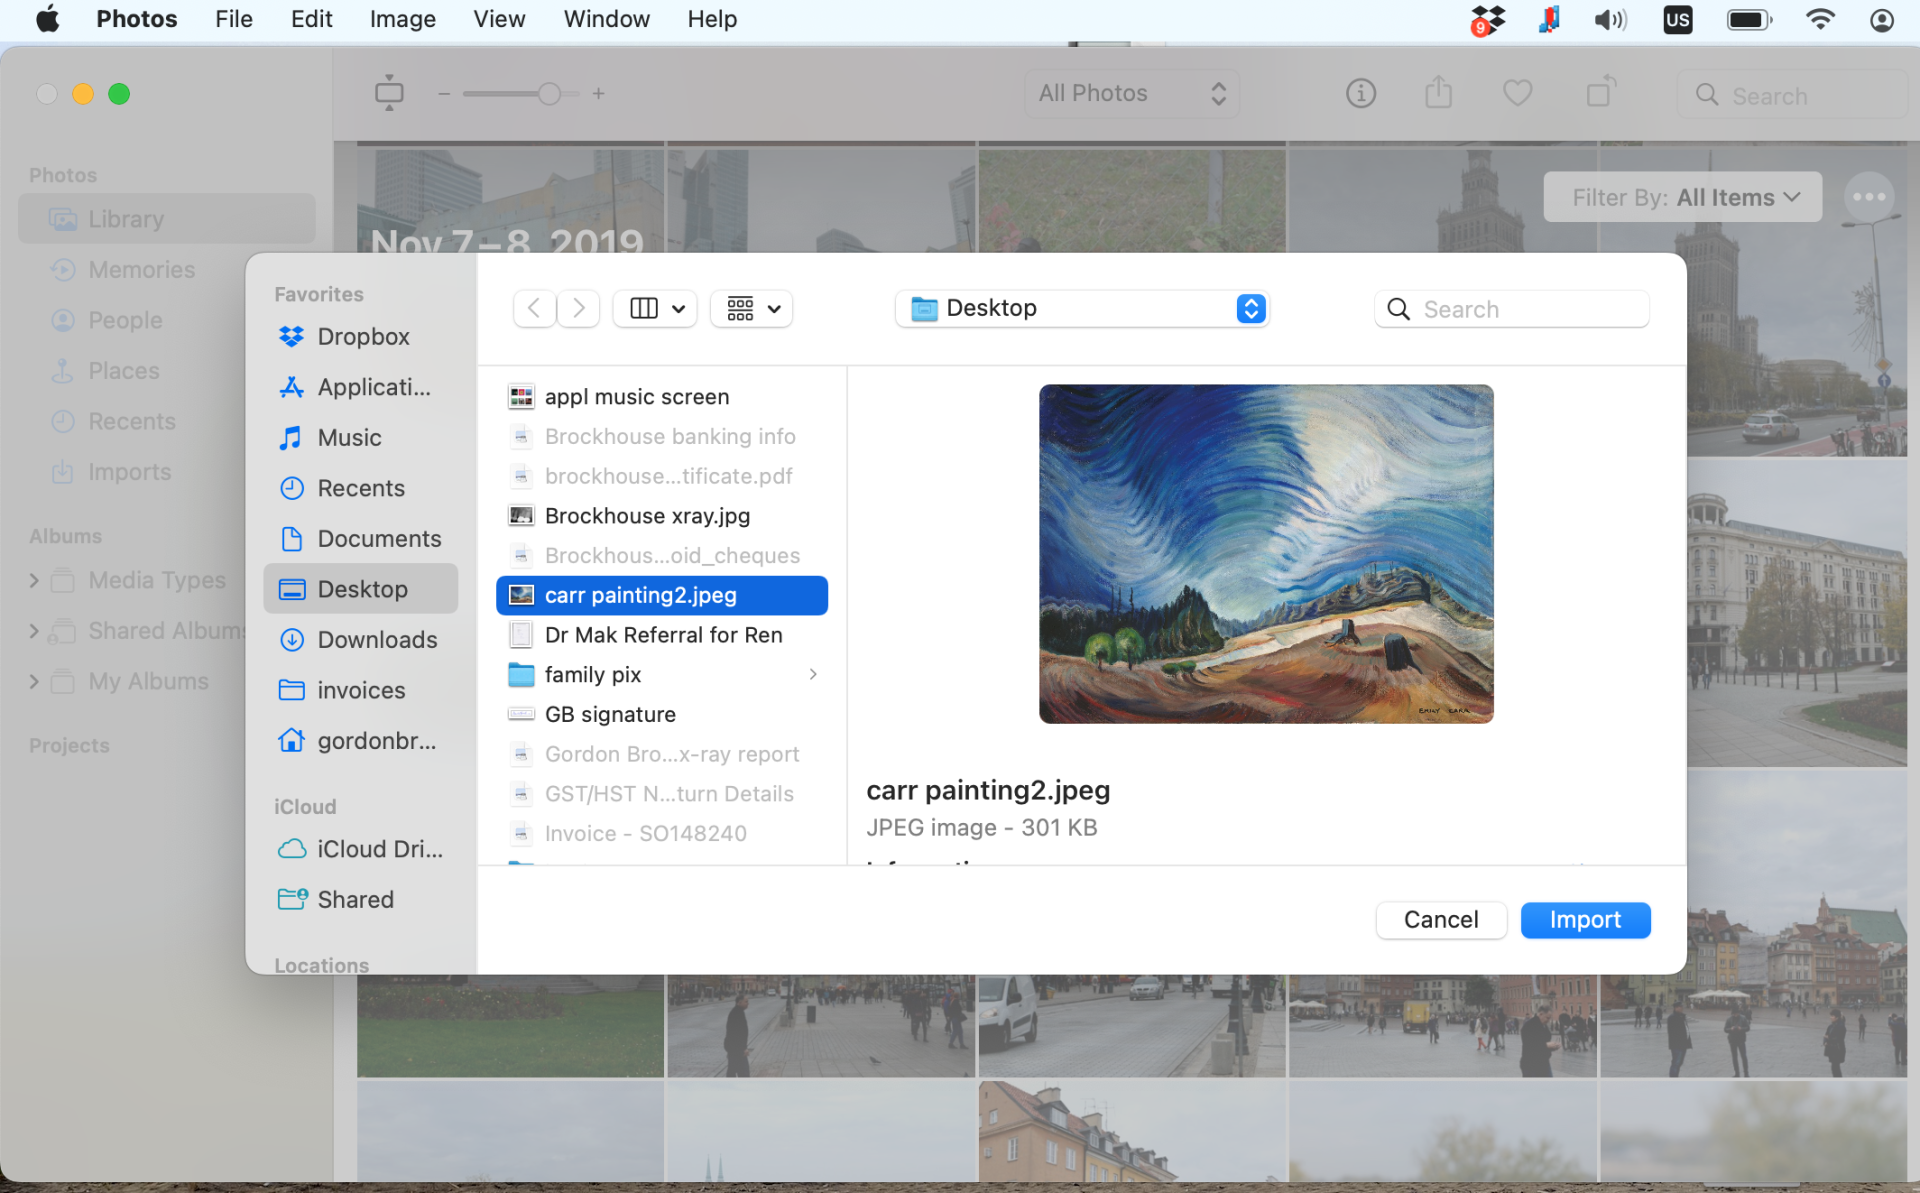
Now let’s look at how Mac users can prep their images. The first step is to crop your image to 16:9 ratio. Mac users can do this by importing the image file into the Photos app. Launch Photos, choose Import … in the File menu, navigate to the image file, and click the Import button. Select your image and click the Edit button at the top right.
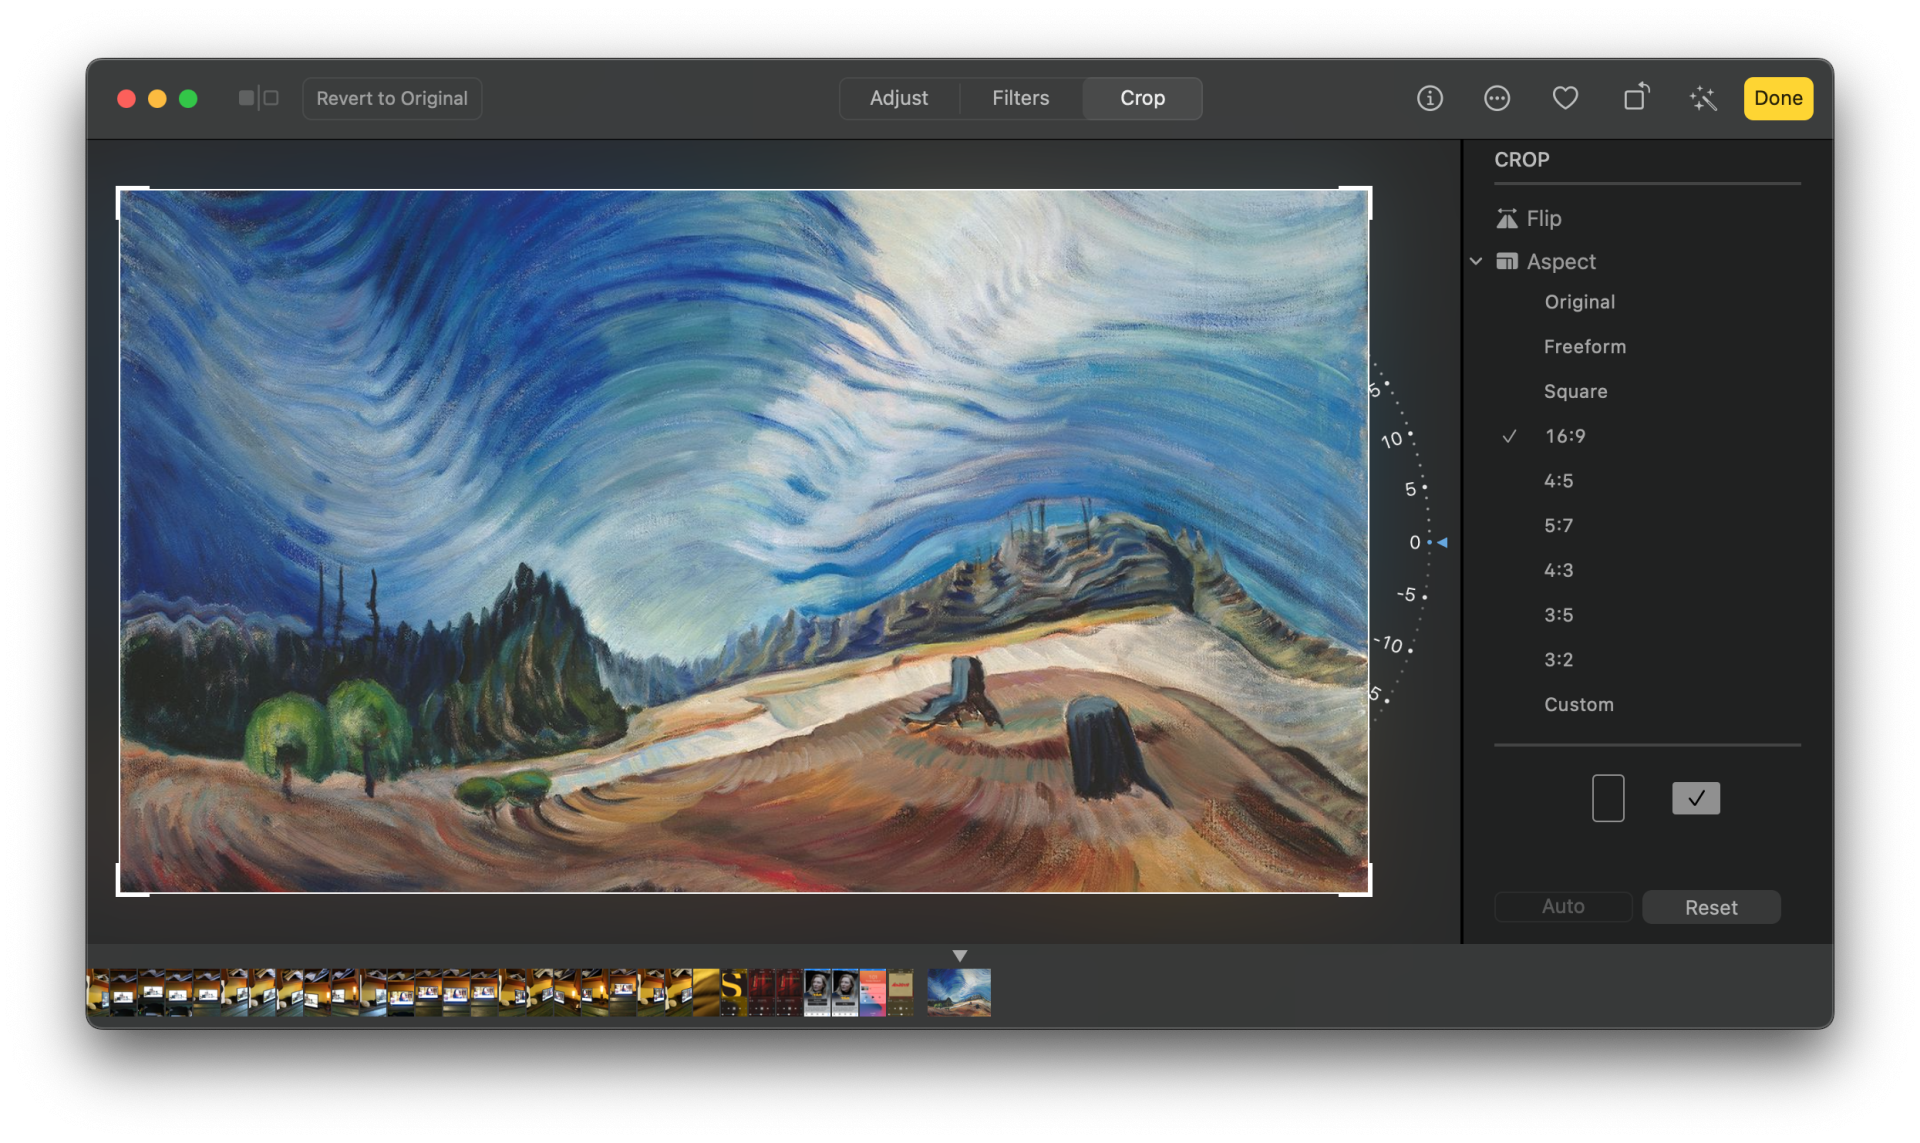
In the Edit window, choose the Crop option, and select 16:9 from the list of aspect ratios on the right side of the screen, then drag your image up, down, or sideways so that it includes the most important elements. When you’re finished, click the Done button. Back in the home screen of the Photos app, choose Export in the File menu, and specify a file type (again, I suggest JPEG) and specify a filename and destination folder for your cropped image.
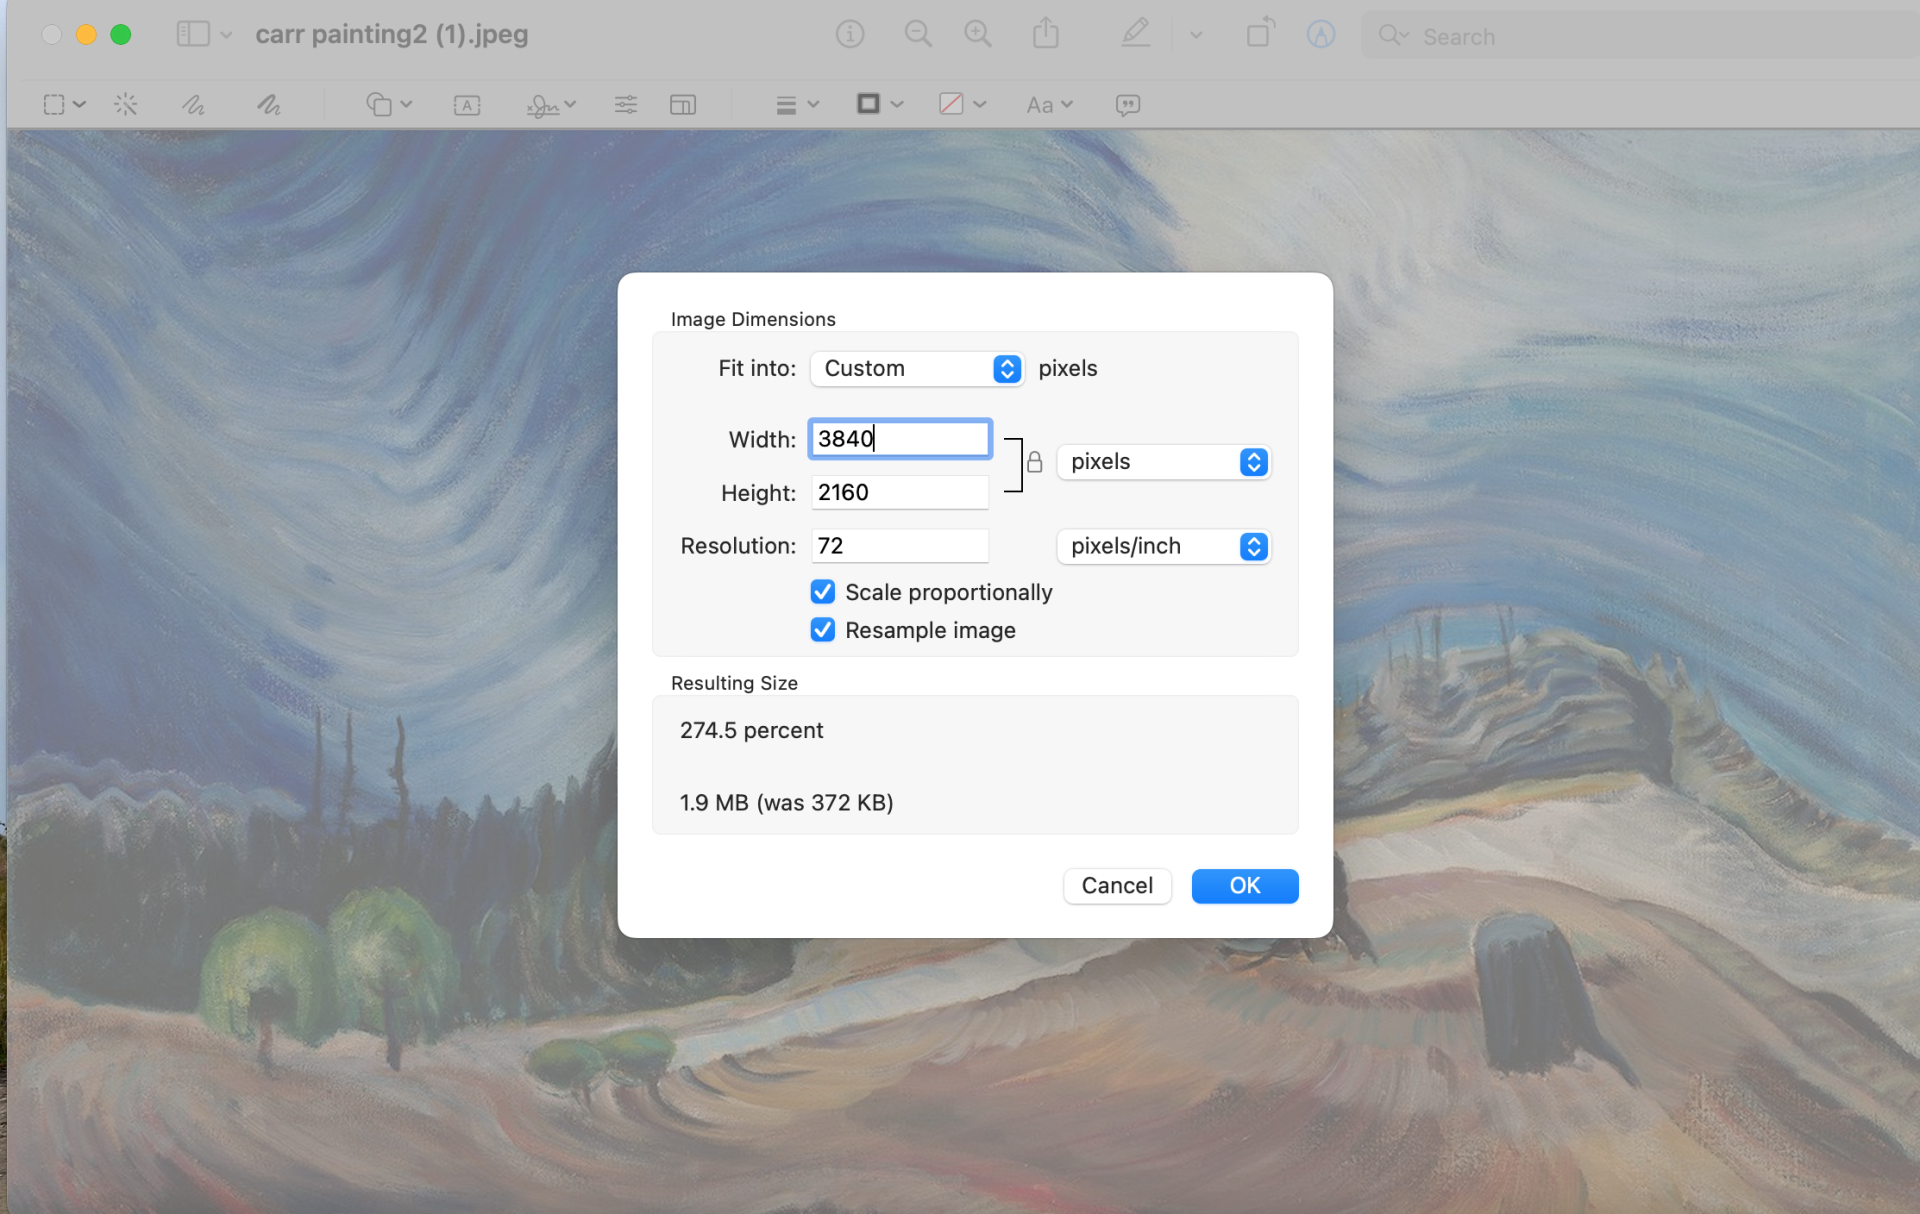
To resize the image, double-click the file to open it in the Preview app, then choose Adjust Size in the Tools menu. In the Image Dimensions dialog box, make sure the Scale proportionally and Resample image checkboxes are ticked, and enter 3840 into the Width field; the Height field will automatically be set at 2160. Choose the Save option in the File menu to save your resized image, and you’re ready to load it onto your Frame TV.
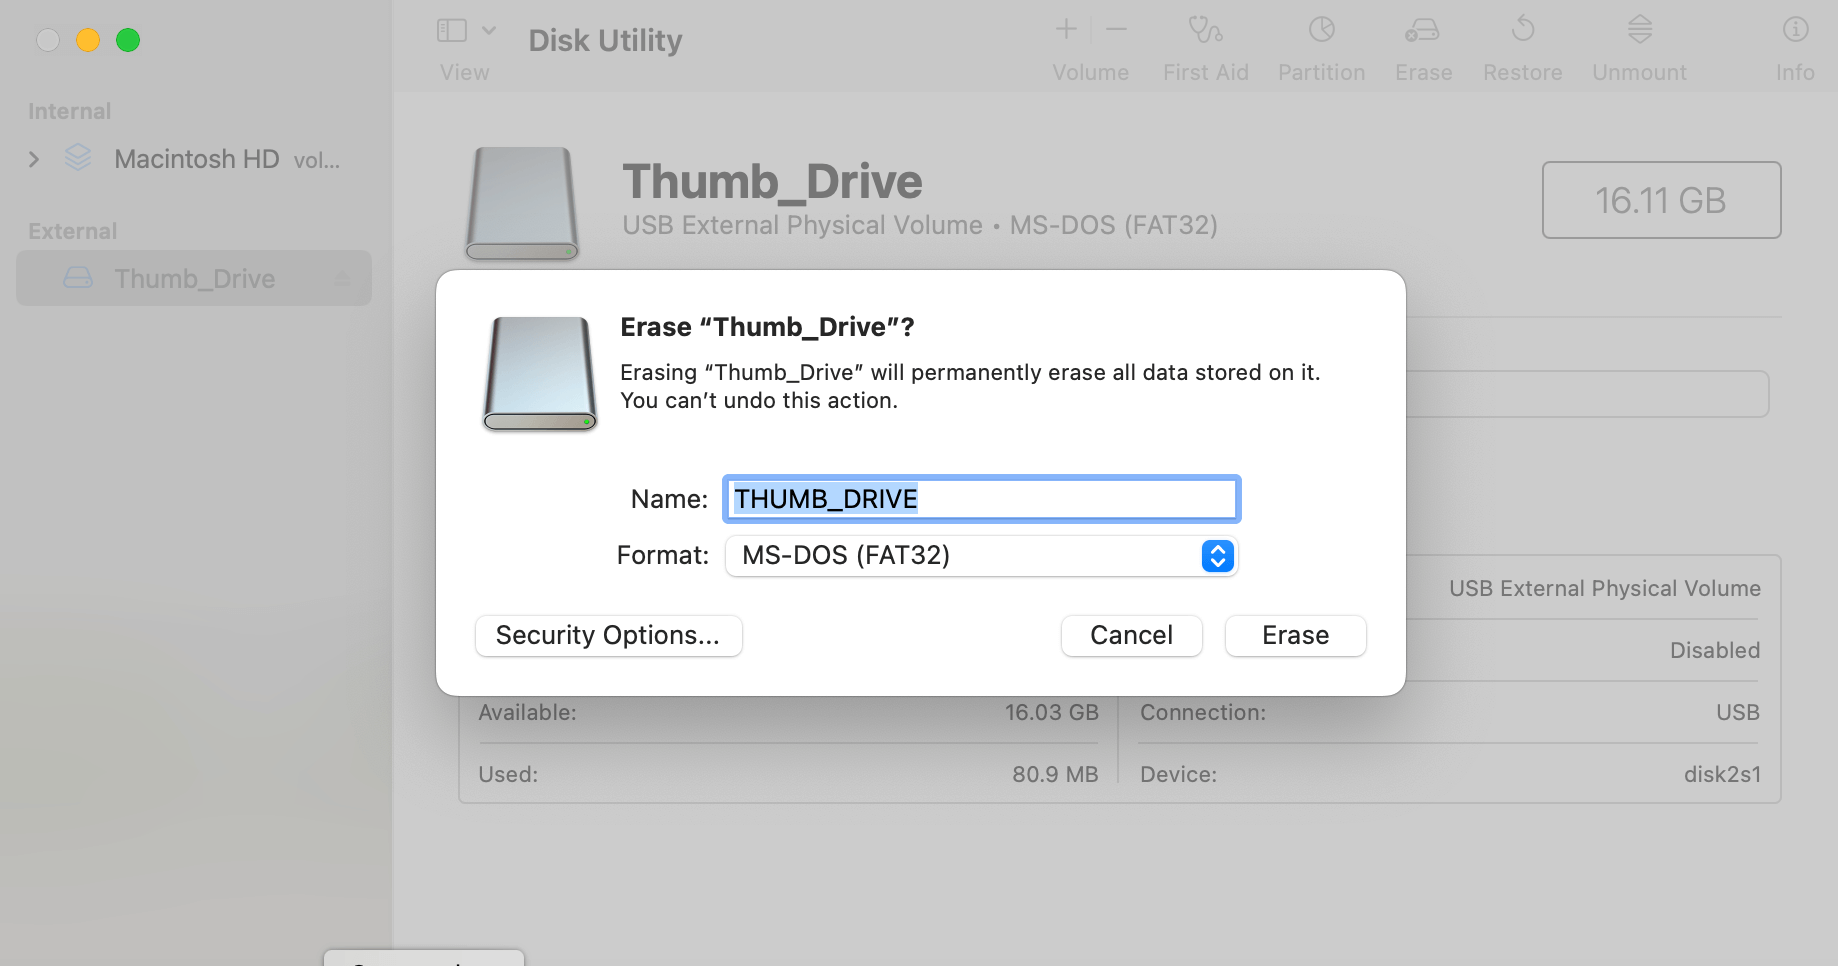
With both Windows PCs and Macs, the next step is to copy your image(s) onto a FAT32-formatted thumb drive. Almost certainly, your thumb drive will be using the FAT32 file system, but if you’re not sure, it’s a good idea to check. To confirm whether the file format of your thumb drive is FAT32 on a Mac, right-click on the drive icon in Finder and choose Get info from the pop-up menu. If the format is something other than MS-DOS (FAT32), launch macOS’s Disk Utility app, select Erase on the top of the application window, and in the dialog box, make sure the Format is shown as MS-DOS (FAT32), then click Erase.
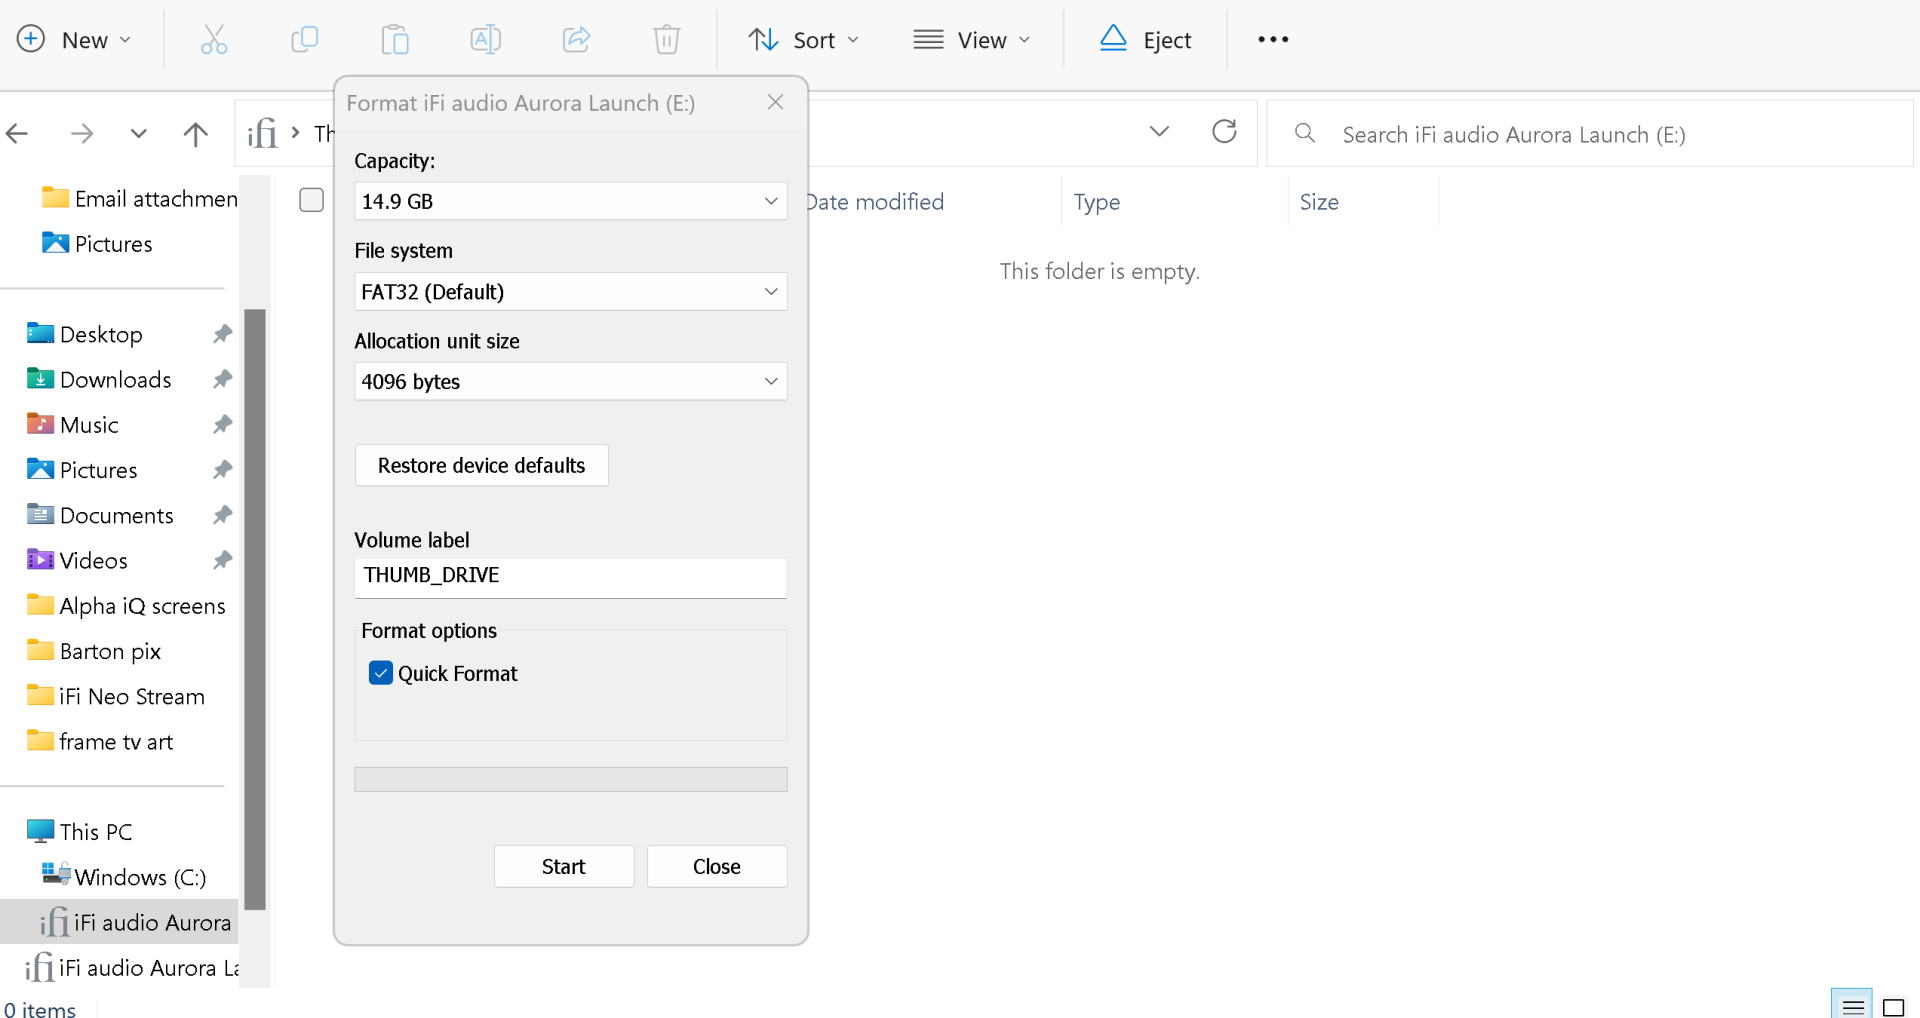
On a Windows PC, to confirm whether the file format of your thumb drive is using the FAT32 file system, launch File Explorer, right-click the thumb drive icon and select Properties in the pop-up menu. If it’s something other than FAT32, right-click on the drive in the File Explorer app, choose Format and in pop-menu, select FAT32 as the file system and press the Start button to reformat the drive to FAT32. Note that when you reformat your thumb drive in either macOS or Windows, all content on the drive will be deleted.
After you’ve copied your image file(s) onto a thumb drive, eject the drive from your computer and plug it into a USB port on the back of the One Connect breakout box for your Frame TV. The process of transferring files from your thumb drive to the Frame TV will vary slightly depending on the model year. But generally, it works like this.
After you plug the drive into your One Connect box, (the usb slot is on the side of the Connect box) a screen showing the drive contents should appear on your TV. If this doesn’t happen, press the Home key on your TV remote and scroll left to the Art app, then scroll down until you see the three-item My Collection menu and then select the USB Disk option on the right. Now you’re in the screen showing the contents of your drive. Select Options at the top of the screen, fill in the checkboxes on the images you want to save to your TV, and scroll up and click on Save to My Photos.
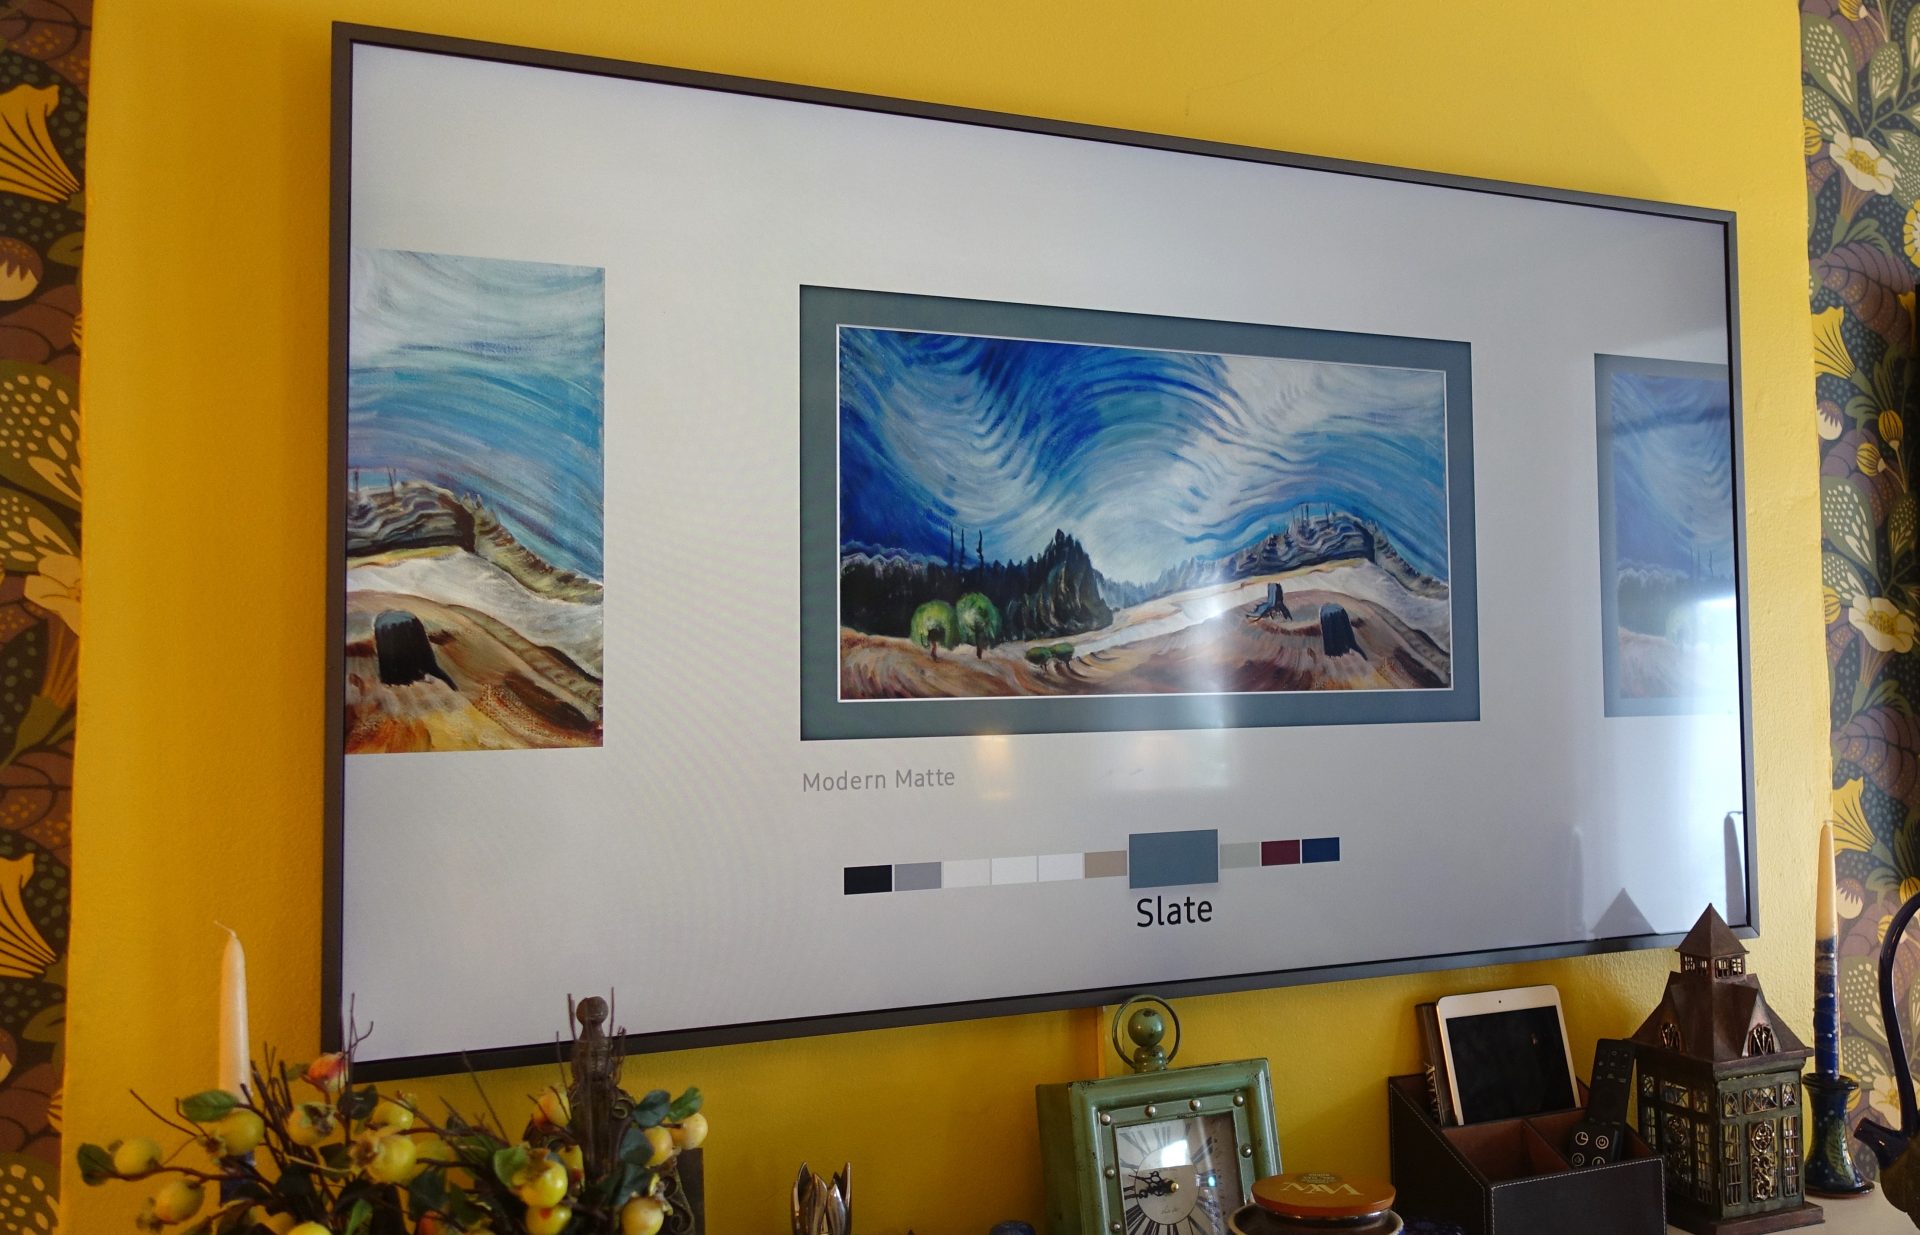
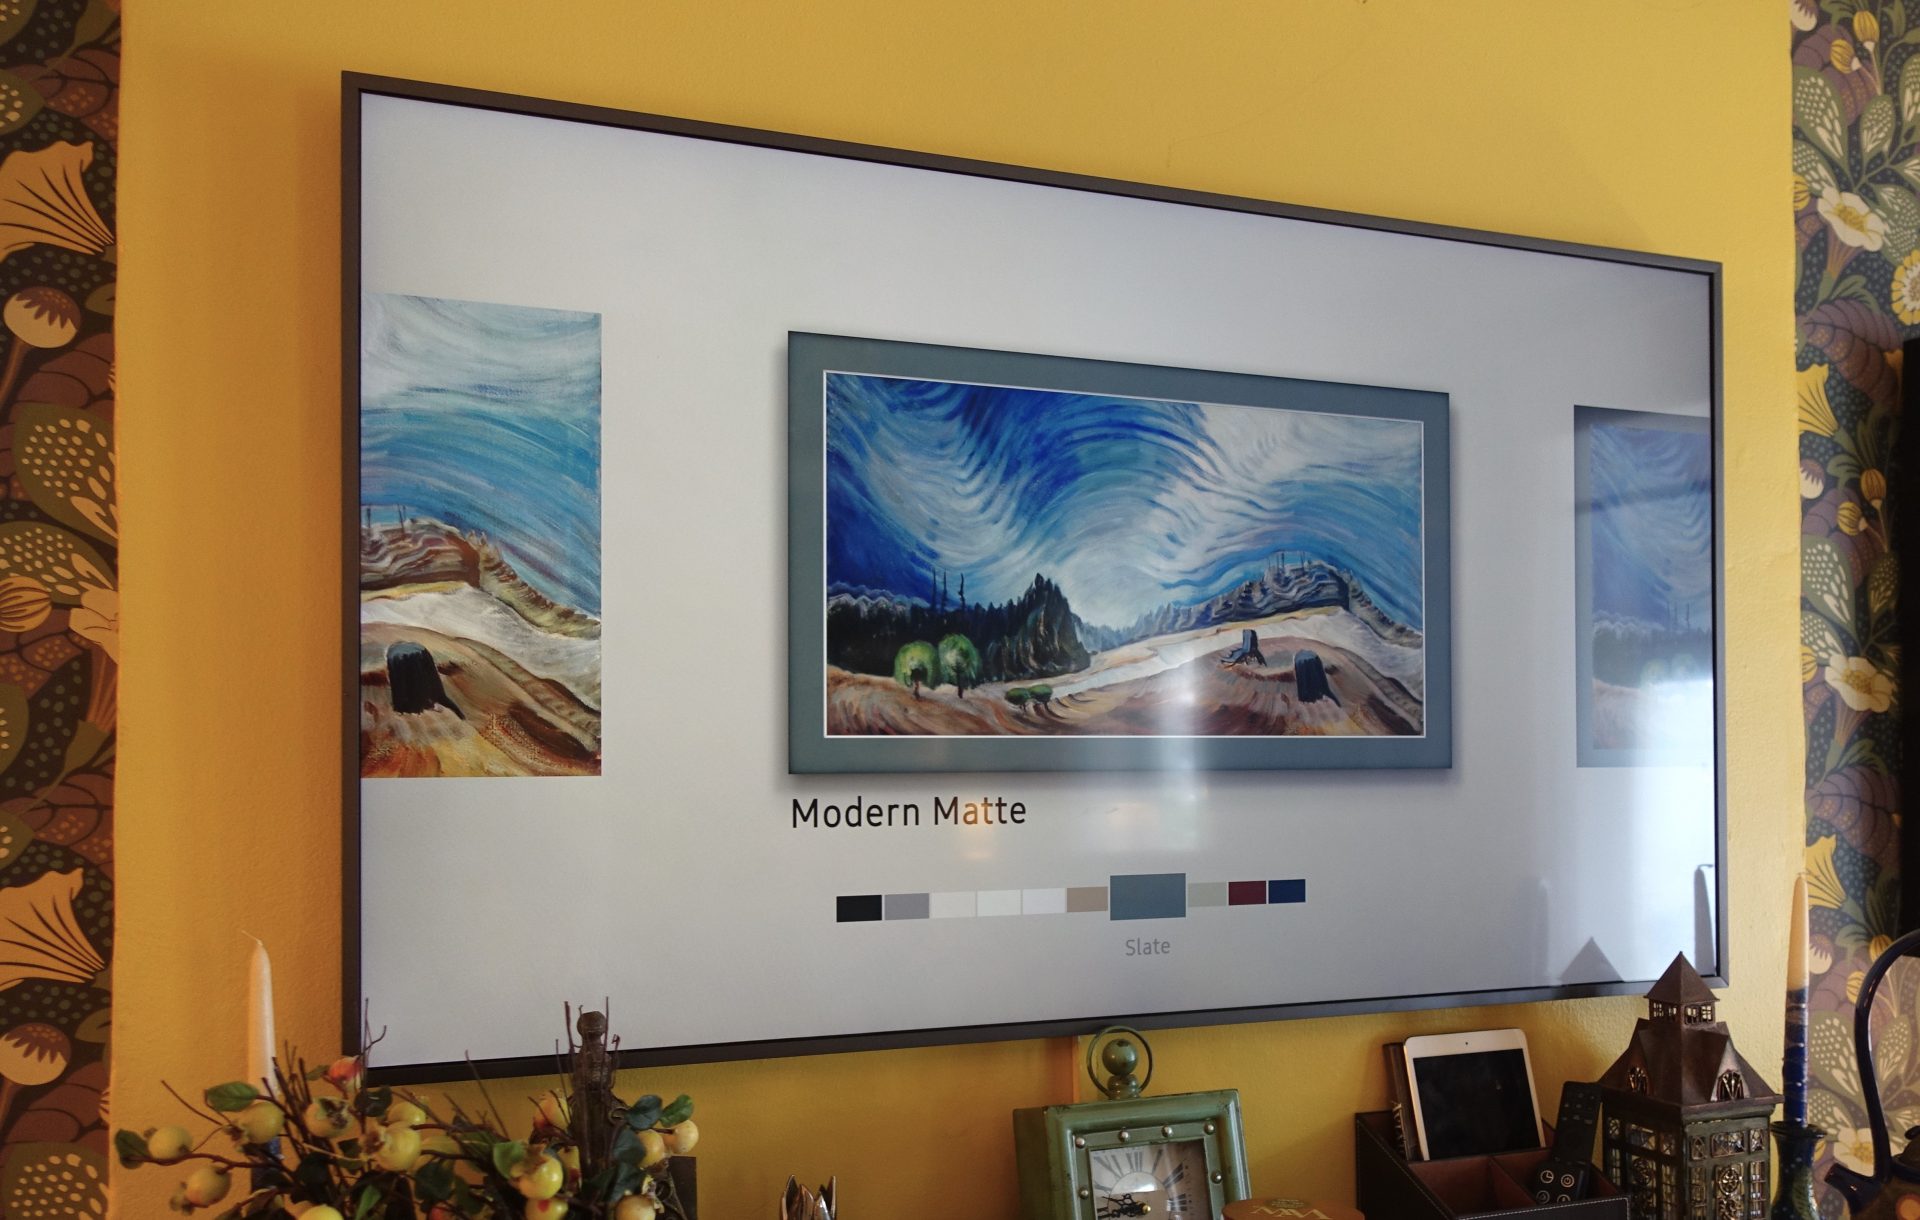
The last step is selecting a matte for your image. Select the image you want to display, and in the next screen, scroll up and click on Options, and in the next screen, click on Matte. You’ll see three options: No Matte, Modern Matte and Shadowbox Matte. Choose the style you want, and then scroll down and choose a color for your matte, and in the next screen, choose Set. Your new piece of virtual art will appear on your Frame TV screen. Congratulations, curator!